Category
ICB template
ADVANCED: How to force a space after the last element in an HTML page
From time to time, your colleagues may ask for help because they cannot insert a new element at the bottom of an HTML page based on the ICB Template..
While this problem can be avoided through the use of spacer elements, it won’t always be avoidable.
Here’s how to insert a paragraph space after the last element on a page so that further elements can be added. This is an advanced technique, involving some basic editing of HTML Source Code! If you are not confident doing this yourself, ask your local support team for assistance.
Step 1
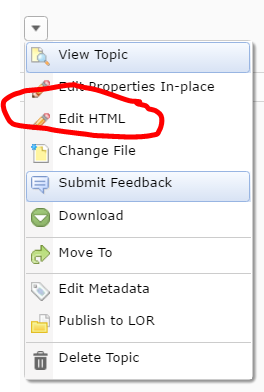
Ensure that your colleague has saved the page and is no longer editing it. Locate the page in the Content tool, select the little black arrowhead to the right of the page name, then choose Edit HTML from the menu.
Step 2
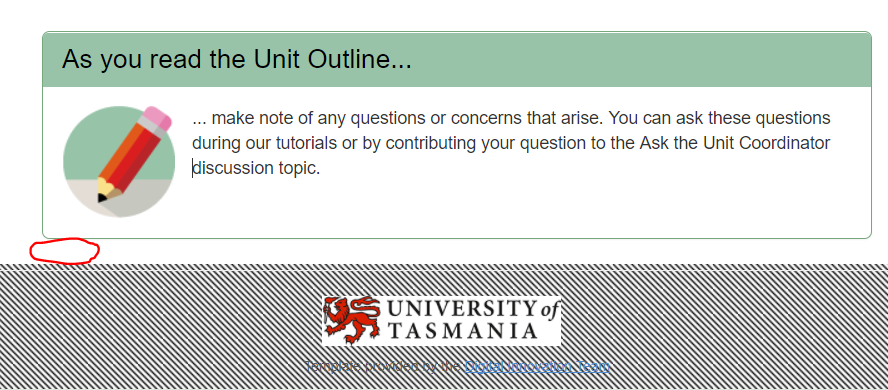
The WYSIWYG editor will open. Scroll to the bottom of the page.When you try to select this space/place your cursor in between the last element and the page footer, you will notice that you cannot select/get the cursor to appear. This means that there is no space remaining. You will need to code in a new space (essentially, a paragraph containing no characters).
Step 3
You should notice the HTML Source Editor symbol appears towards the bottom right corner of the page. It looks like this. – </>. Select the HTML Source Editor symbol.
Step 4
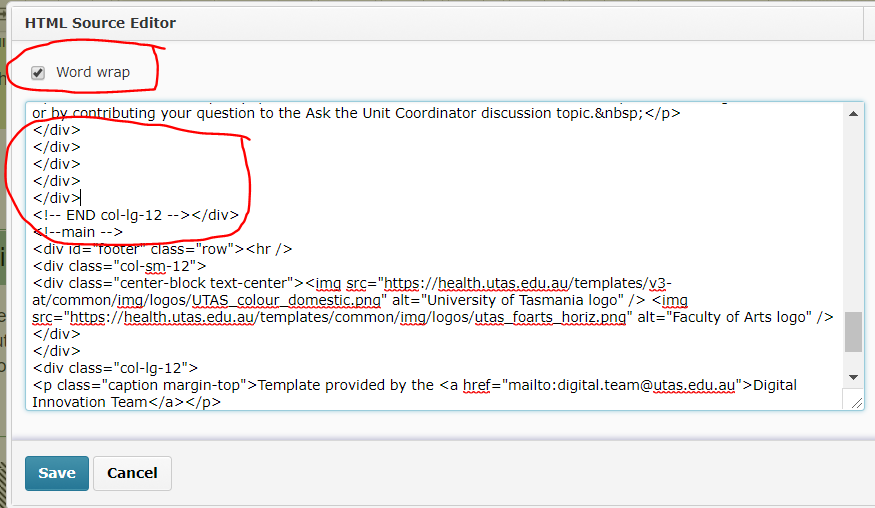
The HTML Source Editor will open. Ensure that the Word Wrap option is selected, then scroll down towards the very bottom of the source code. Around 18-20 lines up from the bottom, you should see the code shown in the image below. Look in particular for a line of code that says <!– END col-lg-12 –></div>. The next line of code should say <!–main –> . If you have trouble finding this snippet of code, press CTRL + F (PC) or Command + F on your keyboard, then type END col-lg-12 into the search field. Press Enter or Return on your keyboard. This should help you find the correct code snippet (it will usually highlight a matching result for you).
Step 5
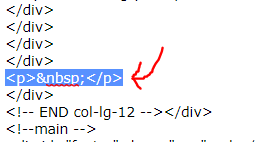
Once you have found the <!– END col-lg-12 –></div> code snippet, look just above it. You should see about five lines of code, each with the identical tag, </div>. Place your cursor just behind the fourth </div> tag in the list, then press the Enter or Return key on your keyboard to create a new line. Type the following text into the new line – <p> </p> – as shown below.
IMPORTANT!: The new code must go after the fourth </div> tag in the list. If you place it higher in the list, or at the end of the list, you may accidentally alter the alignment of text on the page, or the properties of an existing template element.
Step 6
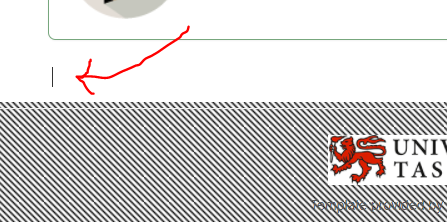
Press the Save button to return to the WYSIWYG view of the HTML page. A paragraph space should now appear at the bottom of the page. You should be able to place your cursor in this new space. You may wish to add some Spacer template elements to the area, so your colleague doesn’t ask you to repeat this process again for them in the near future. Don’t forget to save the changes you have made to the page!
Open a MyLO HTML page in editing mode
In MyLO, an HTML page is like a web page. It can contain different types of content, including formatted text, images and multimedia (like embedded videos). If a page is based on the Interactive Content Builder (ICB) template (open in new window), you can use a range of elements to improve general look and feel, as well as interactivity, of an HTML page.
To change the existing content of a page, remove existing content or add new content you will need to choose to edit the page.
Choose to edit a page
First, navigate to the page you wish to edit on your unit’s MyLO site. It can usually be found somewhere in the Content tool.
You can choose to edit the page BEFORE you open it, or AFTER you open it. Simply select the small black arrowhead that appears to the right of the page name. Select Edit HTML from the menu.
How will I know that a page is in editing mode?
When a page is in editing mode, you will notice that the editing toolbar appears towards the top of the page. These tools can be used to add media, insert hyperlinks (known as Quicklinks) and apply formatting to text.
Embed an Echo360 video in an HTML page
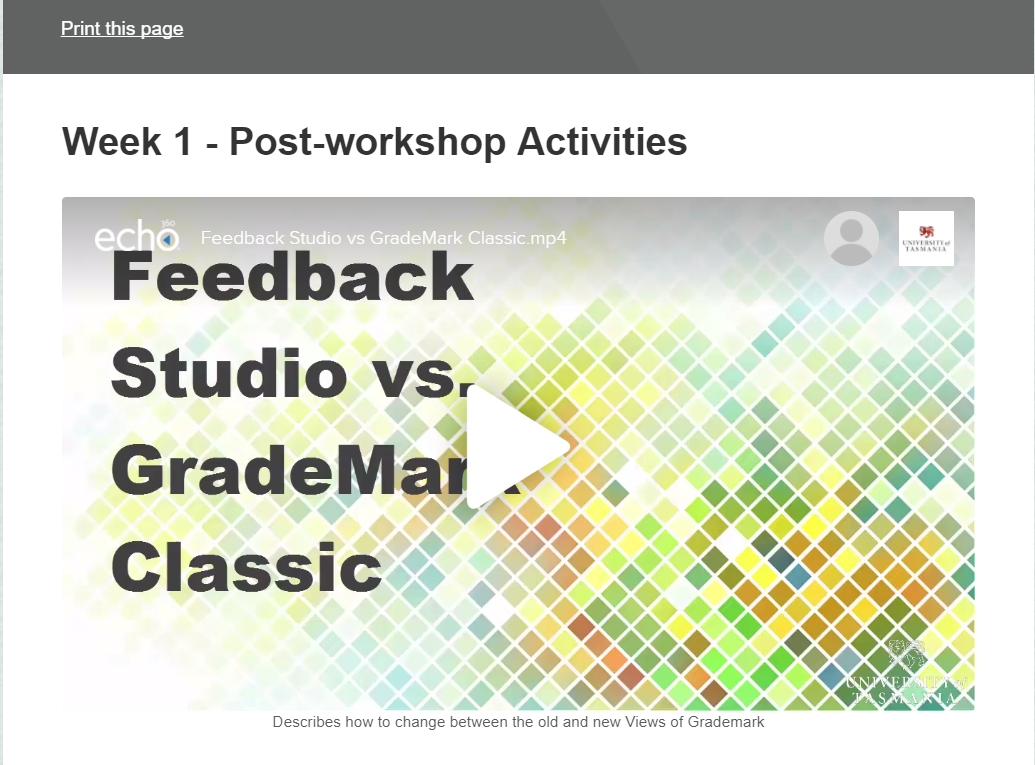
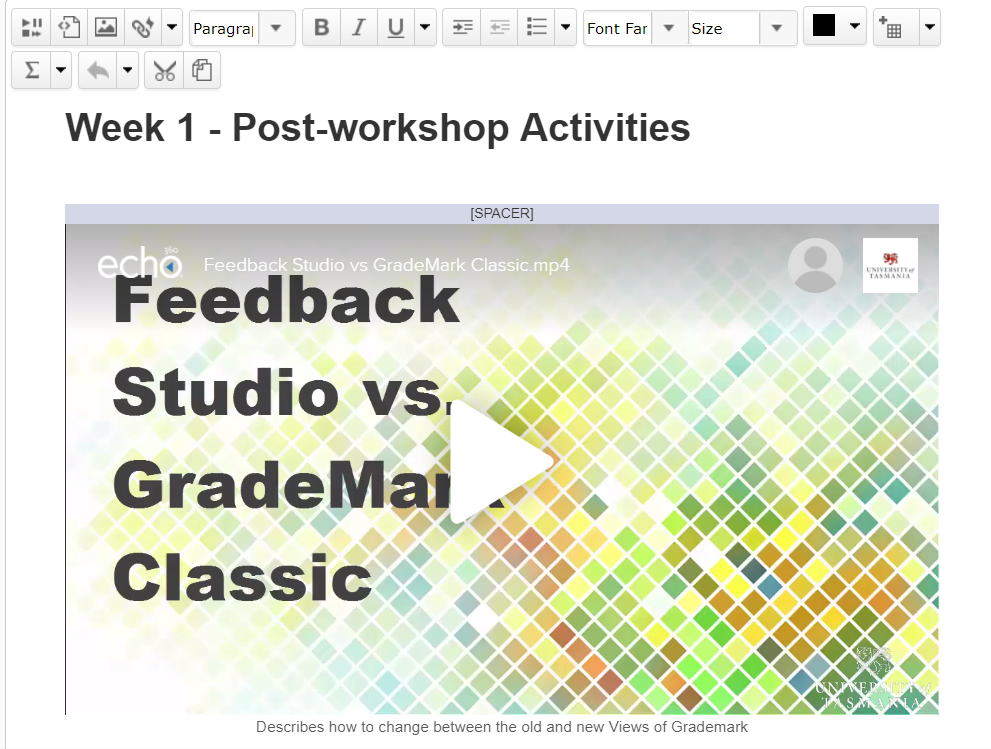
If you upload a video to your Echo360 Library, or to an Echo360 Section, you can embed the video in a page in your MyLO site using a feature called a Public Link. The resulting video may look something like this when inserted into an HTML page based on the ICB template.
If you embed an Echo360 video in an HTML page, you are using what is known as a Public Link. Public links will not allow you to track who has accessed the video. It is also possible for savvy students to obtain and share the link to the video with students outside your unit (and to the general public). If you would like to be able to track which students have accessed a video, and only allow access to UTAS users, we recommend that you upload your video to a unit Section and use a Quicklink to provide access to the video.
If you’re certain you want to use a Public Link, follow these instructions.
Before you start
Have the following open, each in a different browser tab.
- The HTML page in your MyLO site that you wish to add the video to, preferably already in editing mode.
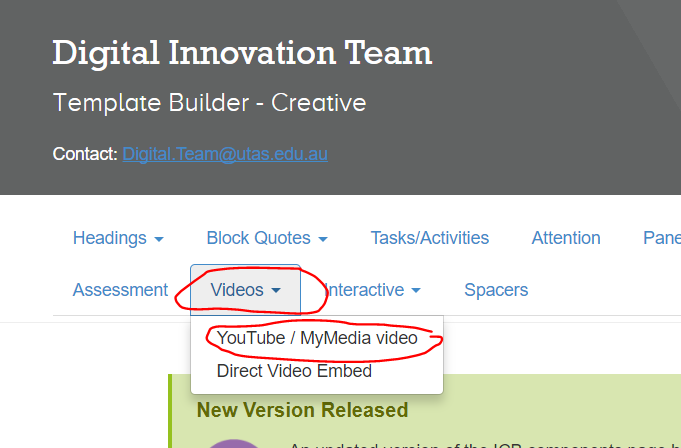
- The ICB Template page. You may wish to select the Video menu, then choose the YouTube/MyMedia video option, in advance.
- Your Echo360 Library or a unit Section. You can usually access these from a link in your MyLO site OR by logging in (via institution) at www.echo360.org.au (opens in new window)
Step 1
Locate the video you wish to use, either from the Echo360 Section for your unit, or from your Echo360 Library.
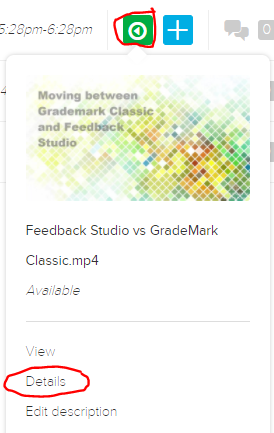
If you are using a video from an Echo360 Section, select the green icon to the right of the video name and choose Details from the menu.
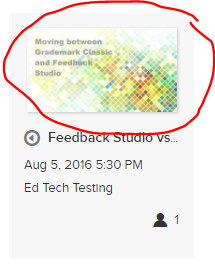
If you are using a video from your Library, you will need to locate the video and click on the preview image.
Step 2
You will see three tabs appear beneath the video. Select the Sharing tab.
Step 3
Scroll down until you see the heading Public links. If you cannot see a link there already, select the Add Public Link button.
Step 4
A link will now appear. Select the Embed button to the right.
Step 5
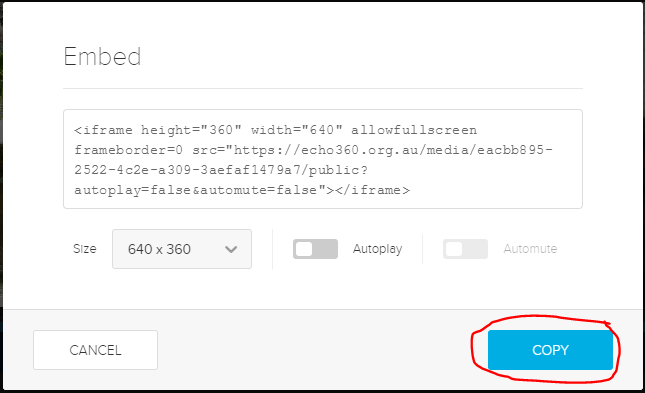
A new window will pop up. This contains the embed code. Select the Copy button. This will copy the code to your computer’s temporary memory.
Step 6
Now jump to the browser tab containing the ICB template page. If you haven’t already done so, select the Video menu, then choose the YouTube/MyMedia video option.
Step 7
Scroll down under the video until you see the Embed Code field. Place your cursor in the field, use one of the following keyboard shortcuts to paste in the embed code you copied earlier:
- On a PC, CTRL + V; or
- On a Mac, Command + V.
This should copy the code into the field. Once the code appears in the field, press the Copy to Clipboard button. This copies some more code into your computer’s temporary memory, to make your video more responsive to different screen widths and devices.
Step 8
Now jump to the browser tab containing your MyLO site. Ensure that the page you wish to add the video to is in editing mode. Place your cursor where you would like the video to appear, then use one of these keyboard shortcuts:
- On a PC, CTRL + V; or
- On a Mac, Command + V.
Your video should then appear on the page. You can replace the caption beneath the video by selecting it and replacing it with your own text OR you can select it and delete it.
Step 9
Continue to work on your page. When you’re finished, don’t forget to save!
Link to items inside, and outside, of your MyLO unit
MyLO includes a powerful tool known as Quicklinks. This tool allows you to link to a range of items inside and outside of your MyLO site. You can use this tool to create links pretty much anywhere in MyLO including Announcements; Descriptions of Modules and Items; HTML Pages; Discussion posts; and feedback in Assignment Submission Folders, Rubrics and Quizzes.
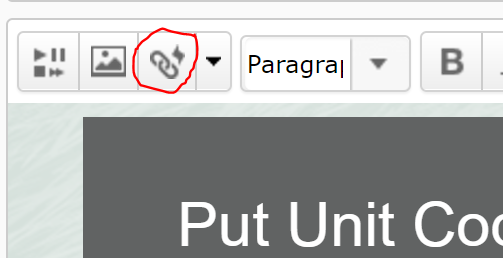
As a general rule, if you can see this icon when creating or editing something, you can use the Quicklinks tool!
In this post, we show you how to insert a Quicklink. including how to choose linking options, in five (5) steps. We then provide a summary of the types of items you can link to, and the best target behaviour to use with each item type.
How to insert a Quicklink and choose your linking options
Step 1
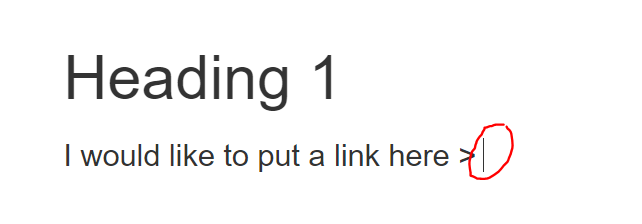
When editing an item in MyLO, place your cursor where you would like the link to appear.
Step 2
Select the Quicklinks tool. It should appear towards the top left of the editing window and will be the third icon from the left hand side.
Step 3
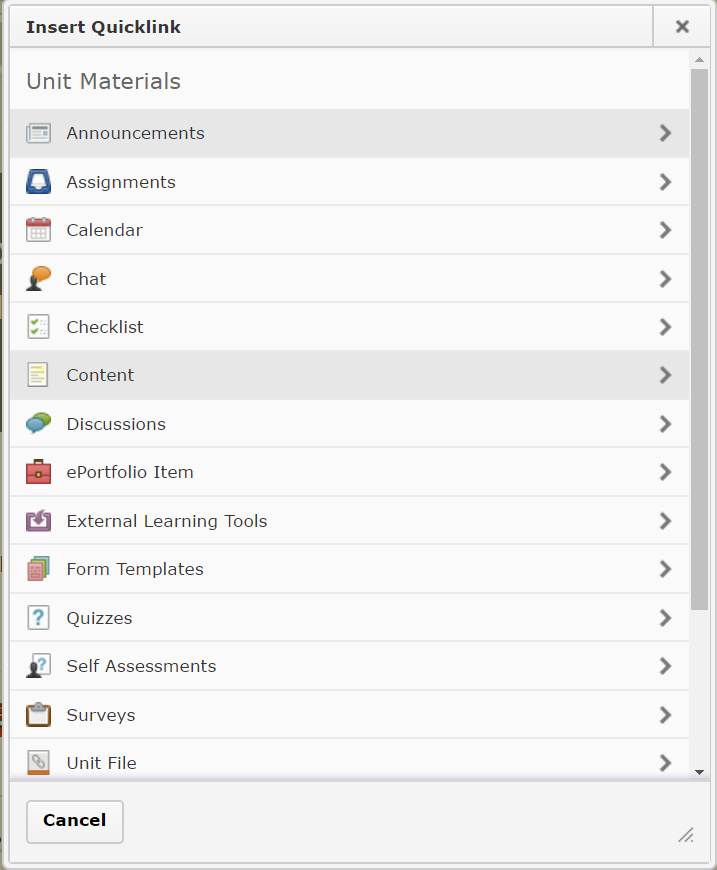
The Insert Quicklink window will open. Select the type of item you wish to insert a link to (for example, here we have selected Content).
Step 4
Work your way through until you have found the item you wish to link to. Select the pencil icon to the left of the item. This allows you to insert a meaningful link text, and control the target behaviour of your link. If you’ve gone too far, use the left-facing arrow symbol (within the Insert Quicklink window) to go back as many times as needed until you reach your preferred option, or press the Cancel button to start again.
NOTE: You cannot select a specific tool or a Content Module to link to. You can only link to items within Tools or Modules. For example, you cannot link to the Assignment Submissions Folder tool, but you can link to an Assignment Submission Folder within the tool.
![]()
Step 5
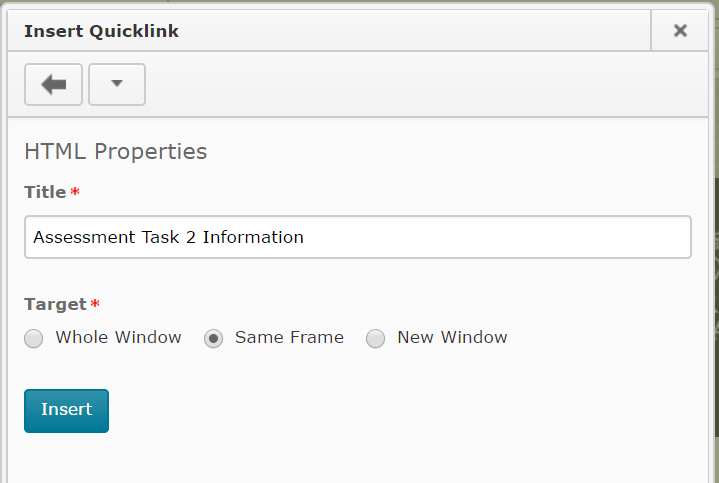
You should now see two options. You can change the default Title text (usually the name of the item) so that it is more meaningful to students. To do this, simply replace the text in the Title field. You can also change the Target. By default, this will be Same Frame. However, we have found that this target behaviour does not work well with many item types. To see if you should change the Target behaviour for a Quicklink, refer to the table towards the end of this page.
TIP: If using the New Window Target behaviour, include the following phrase at the end of your link Title so students know what will happen when they click on the link: (opens in new window). For example: Access the Week 1 Checklist here (opens in new window).
Once you have chosen your options, select the Insert button. Your Quicklink should now appear in the editing window. Continue to edit as normal and don’t forget to Save your work regularly!
Item types and target behaviours
Please note that we have excluded some Quicklinks options as they do not function effectively or are rarely used at UTAS.
| Item Type | Recommended Target Behaviour | Notes |
|---|---|---|
| Assignments | Whole Window | Link directly to an Assignment Submission Folder. |
| Calendar | Whole Window | Link to a Calendar item. |
| Chat | Whole Window | Link to a Chat room. If you haven’t already created a room, you will have the option to Create New Chat. |
| Checklist | Whole Window/New Window | Link to an existing Checklist, or create a new one by selecting Create New Checklist. It can be useful to open a Checklist in a new window if students need to work through the Checklist whilst completing other activities on the MyLO page where you placed the link. |
| Content | Same Frame | Allows you to link to items seen in Modules in Content. Note that you cannot link directly to a Module (folder) using this tool. Some staff find it easier to have a Materials module that they upload class materials to (e.g. Powerpoint Presentations and PDFs). They then use the Content Quicklink, rather than uploading files ad-hoc via the Unit Files Quicklink tool. |
| Discussions | Whole Window | Allows you to link to Forums (best when you have several Group Topics in the one Forum) or individual Topics.To link to a Forum, locate the Forum, and select it. You will see the Forum name, along with all the Topics included in the Forum. Select the small + icon that appears to the right of the Forum name.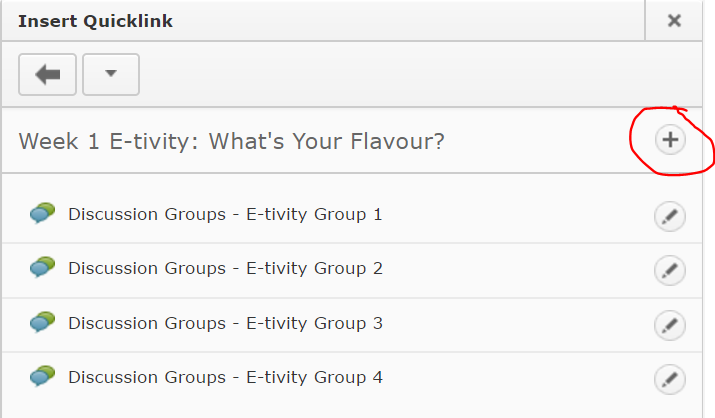 You cannot link to a thread using this method, though that is possible using the Url Quicklink option. |
| External Learning Tools > MyMedia Recordings (ALP) | Whole Window | Creates a link to your Echo360 Section, or to an individual recording in your section (Class). Once the Quicklink is created, you will need to save/preview your item, so that you can follow the link that you have created. You will then need to select the Section/Class you wish to link to take students to. Further instructions are available here for linking to a Section, or here for linking to a single recording (Class). |
| External Learning Tools > MyMedia Recordings (ALP) | Same Frame | Web Conferencing – creates a link to the Web Conferencing tool, so students can then launch the 24-7 room (by selecting the Join Room) or a session (by selecting the session name). |
| Quizzes | Whole Window | Note that students will receive an error message if they try to follow this link before the Start Date or after the End Date has been reached. You may like to mention this in the link text. For example: Please note that you will receive an error message if you try to access the Quiz before DATE/TIME or after DATE/TIME) |
| Surveys | Whole Window/New Window | If students have already completed the maximum number of attempts, they will see a message saying they have no more attempts left. |
| Unit File | New Window | Allows you to select a file from the Manage Files tool (if you have already uploaded the file to MyLO) OR to upload a file from your computer. Uploading a file from your computer via this Quicklink tool will NOT allow you to choose a Target behaviour. We have found this problematic in some cases. You may find it easier to upload files to Manage FIles before linking to them. Alternatively, upload them to a Module (folder) in Content, and link to them using the Content Quicklink. |
| Url | New Window | Allows you to link to a web address (URL). This is typically used to send students to a website outside of MyLO. |
| Equella Select or Add Item | No choice | Allows you to create and link to a new item in the university’s Digital Copyright Management System, known as Equella. You can also link to existing items. This system is generally used to house student readings (like PDFs of a chapter from a book or an article) that are not already available via the UTAS Library. |
| Web Conferencing | N/A | DO NOT USE: Use External Learning Tools option instead. |
Add an image element to an HTML page in MyLO
The Interactive Content Builder (ICB) (opens in new window) template includes three Images options:
- Right, where an image is presented to the right of the screen with text wrapped around it.
- Left, where an image is presented to the left of the screen with text wrapped around it.
- Centre, where the image is centred. Text appears above and below the image: it will not wrap around the image.
All the image options contain a border around the image, and an area beneath it for a caption.
In this post, you will learn how to add an image element to an HTML page (based on the ICB template) in your MyLO site. Alternatively, you can see the process demonstrated in this video (opens in new window).
Step 1
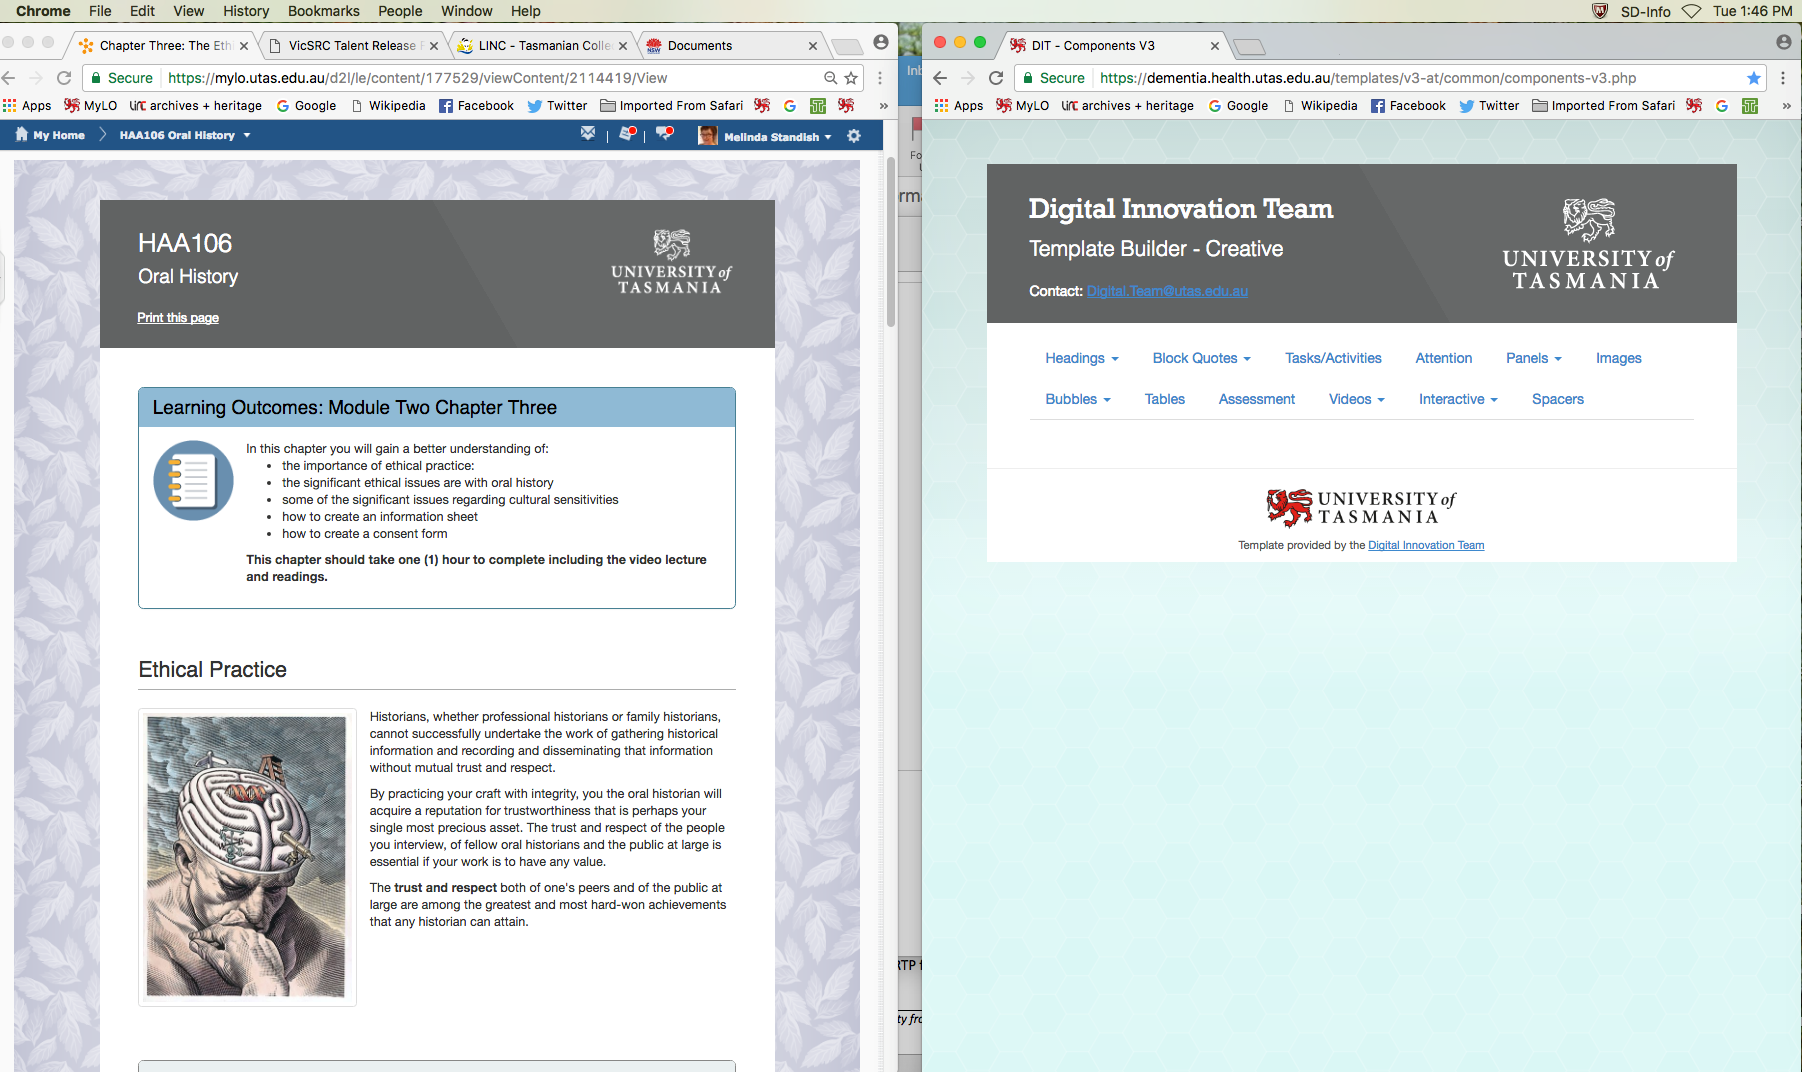
Open your MyLO unit in a browser tab or window, then locate the HTML page that you wish to add the image element to. Keep the browser tab/window open. Open a new browser tab/window and navigate to the ICB Template Builder. You should now have two browser tabs or windows open: one with your MyLO HTML page; the other with the Template Builder page. You will be moving between these tabs/pages throughout this activity.
Step 2
Jump to the tab/window containing your HTML page. Select the black arrowhead to the right of the page name, then select Edit HTML. You can now edit the page.
Step 3
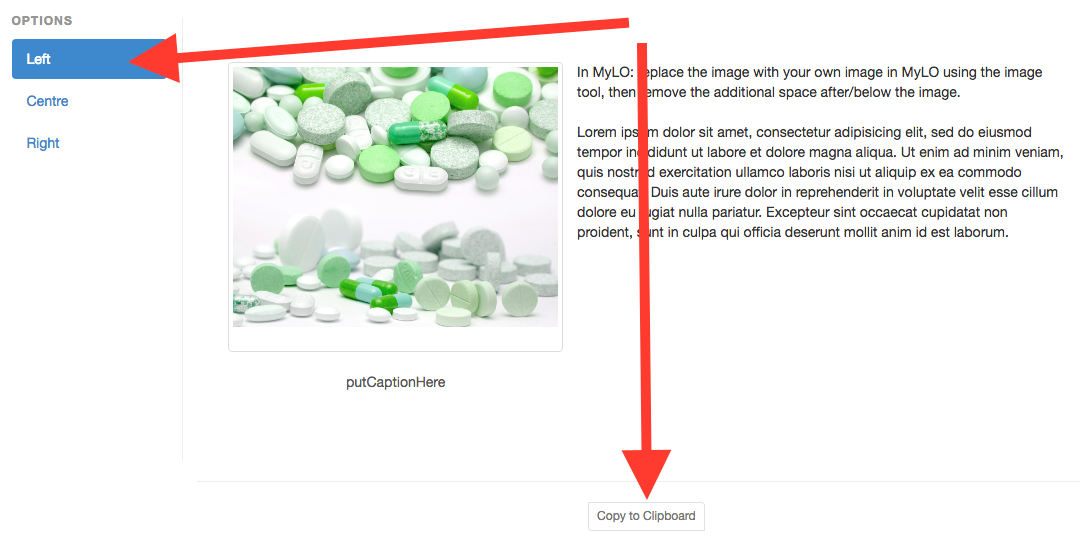
Now jump to the Template Builder page that you opened earlier. Select Images, then choose one of the options from the menu on the left (e.g. Left, Centre or Right). You may wish to move between the options until you have found your preferred element. Once you have located your preferred element, select the Copy to Clipboard button beneath it. This will copy the element to your computer’s temporary memory.
Step 4
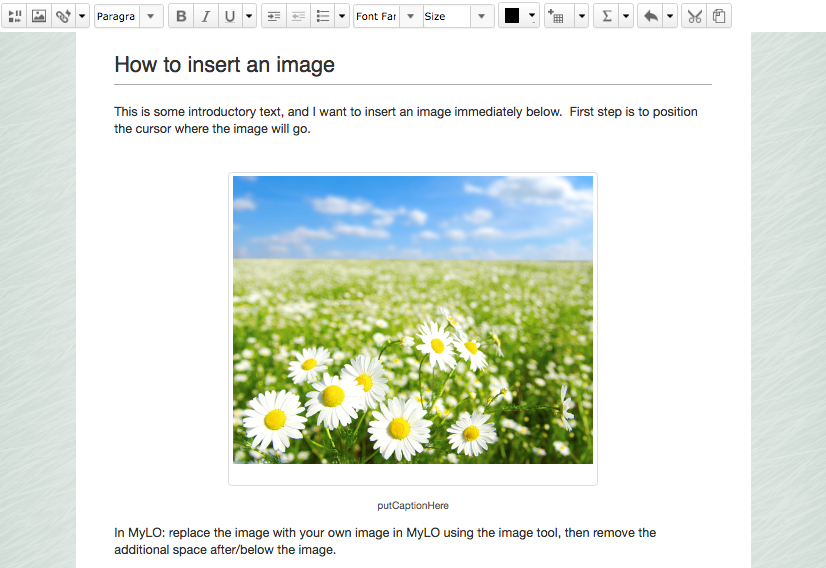
Jump back to your MyLO HTML page, which should still be in editing mode. Place your cursor where you would like the image element to go to go, then select the following keys on your keyboard: CTRL and V (PC); or Command and V (Mac). This will paste the image element into your page.
Step 5
If you’re happy with the position of the image element, you may wish to press the Save button at the bottom of the page to save your changes. If you are not happy with the position or type of image element, select the following keys on your keyboard: CTRL and Z (PC); or Command and Z (Mac). This will undo the changes you just made.
Next Steps
Once you have inserted your image element, you can replace the image, caption text and (where relevant) the wrapped text.
Control the size of a left/right aligned image when using the ICB template (advanced)
The ICB template commonly used to develop pages in MyLO features Images elements that contain right or left aligned images with text.
By default, these images are set to take up a maximum of 30% of the page width. If you’re confident editing HTML, it is possible to override this rule by making a slight change to the code behind the page in the HTML Source Editor.
To do this:
- Insert the left/right aligned template element into your MyLO page. Insert your chosen image (you may wish to Save the page at this point).
- Select the image included in the template. Use the Insert Image tool (in the WYSIWYG toolbar) to insert your chosen image. This must be done before you play with the HTML, as doing it post changes seems to break the formatting.
- Open the HTML Source Editor on the page you are editing and locate the div tag for the image element (usually <div class=”img-right”> or <div class=”img-left”>).
- Insert the following style into the div tag, adjusting the percentage to suit your needs (e.g. here we have used 60%):style=”max-width:60%;”
To illustrate, the original div tag would be as follows (example based on the right-aligned image element):
<div class=”img-right”>
Following your edit, the tag should be as follows:
<div class=”img-right” style=”max-width: 60%;”>

