Tag
Grades
Export Grades to an Excel Spreadsheet
It is possible to export MyLO Grades to an Excel Spreadsheet as a backup or for future reference.
Publish final assessment marks to the Grades tool without releasing the marks and feedback to students
UTAS requires that academics do not release students’ final assessment task marks on MyLO until after the exam period and release of formal grades by the University. You can still mark students’ final assessment piece online and publish the marks to the Grades tool, but you will need to ensure that students cannot see the marks or feedback associated with their final assessment. This is achieved by:
- hiding the Assignment Submission Folder/Quiz Submission View and associated Grade Item from students; and
- ensuring that students cannot see Grades or Assignment Submission Folders in the My/User Progress tool.
These items must be hidden from students before you publish and grades or feedback. The instructions from page 3 of this [PDF] will show you how.
Release internal grade to students
If you have scheduled an examination as the final assessment piece for your unit, you may wish to release students’ internal grade; that is, the grade that they have achieved to date. You can do this using the Final Calculated Grade tool, a feature of the Grades tool.
These step-by-step instructions will show you how to release the Final Calculated Grade to students.
Tool Review: Grades
What does it do?
The Grades tool is used to track student participation and grades over time. You can also use the Grades tool to provide students with a summary of their overall Grade grades. This snapshot of the Standard View of the Grades tool points out some of the key features of the tool.
Useful terminology
Grade Item
A column of the Grades tool dedicated to tracking the grades associated with a particular task. It may be associated with a MyLO assessment tool like a Dropbox or Quiz, or it could be a standalone item used to track classroom participation or presentations.
Standalone Grade Item
A Grade Item that is not linked to any type of MyLO activity. Generally used to track attendance and participation, or the scores associated with an in-class performance (like a presentation).
Category
Used to organise Grade Items into clusters. It can convert the sum total of all the Grade Items in the Category in accordance with specified weightings. The outcome of this calculation is seen as a Subtotal. Categories can also be set up to drop a specified number of items with the lowest or highest grades, or to drop ungraded items.
Settings
Used to control elements of the Grades tool, such as whether a points or weightings system is used, the way students see their Grades (by default) and the way you see Grades.
Release Conditions
Control student access to Grade objects, based on date, or on Group membership (including whether students are enrolled in Internal or External study modes).
Helpful resources and instructions
- How to set up your Grades tool
This comprehensive guide contains all you need to know to set up your Grades tool to suit the structure of your unit assessment, and your preferred method of viewing Grades. - How to hide or un-hide Grade Items for students
- How to create a Standalone Grade Item
This is a useful method of tracking Grades for items that will not be completed in, or submitted to, MyLO, for example, participation or in class presentations. - How to associate a Grade Item with a Dropbox, Discussion or Quiz
- How to release internal grades to students
This post explains how you can use the Final Calculated Grade tool to release an internal grade to students, prior to them sitting a final examination. - Publish final assessment marks to the Grades tool without releasing the marks and feedback to students
- Export Grades to an Excel Spreadsheet
- Quickly grade unsubmitted work as 0
The Grades tool will ‘drop’ Grade Items from a Category subtotal or the Final Calculated Grade if no numerical score is recorded. If you don’t want a student’s grade for an item to be dropped, you will need to record a score. 0 should be recorded to represent non-submission/no-show.
Hiding or un-hiding Grade Items
When they visit the Grades tool, your students will only see Grade Items that have been made visible to them.
In this video, Peta explains how to make a Grade Item visible or invisible to students by altering its settings. She also explains how to restrict visibility to particular groups of students.
If you use Grade Categories, please make note:
Categories can be used to organise Grade Items. Like Grade Items, Categories can be hidden from student view. You make them visible/invisible the same way that you would do for a Grade Item. However, if you hide a Category from students, this will automatically hide all the Grade Items in that category, even if they are set up to be visible.
Publishing Quiz results so students can see them
Where are Quiz results published to?
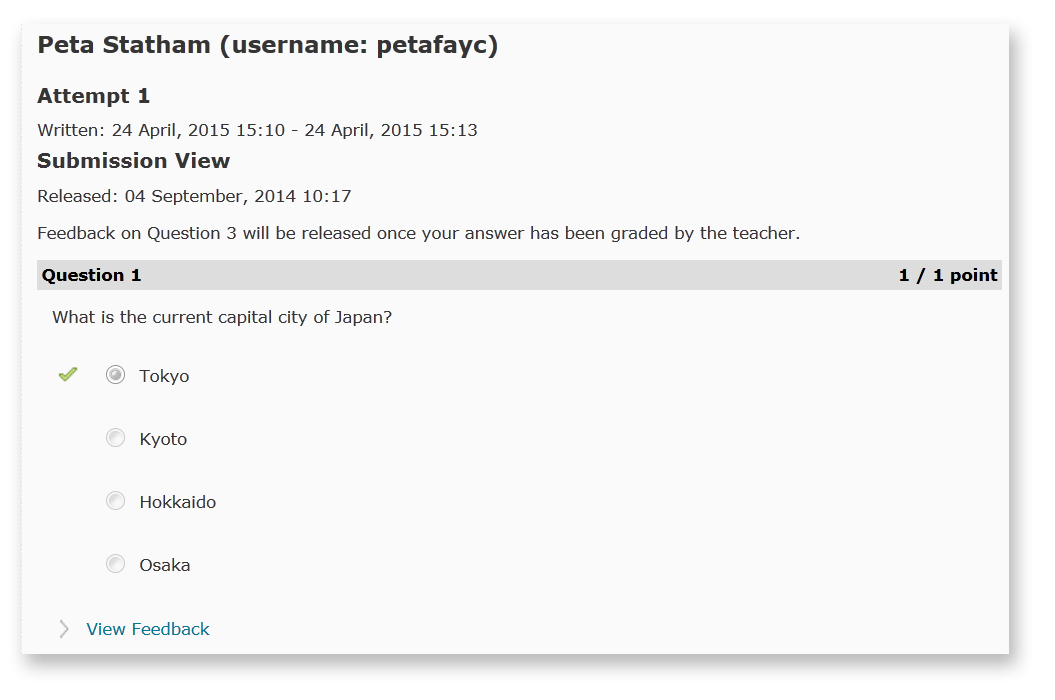
There are two places where Quiz results can be published so students can see them. The first is the Quizzes tool. This view is controlled by the Submission View settings, which can be altered when you create or edit a Quiz. This image shows how feedback may appear to a student in the Quizzes tool. In this example, students can see their answer, as well as the correct answer (indicated by a green tick), and their score for the question.
A Quiz score can also be published to the Grades tool. This tool is generally used when a Quiz score will form part of the formal assessment of a unit. The Quiz will need to be connected to a Grade Item for this to work. You can decide when (or if) students will be able to view the Grade Item. Students will only see the total score for a Quiz here – they will not be able to see their answers, correct answers and so forth.
Can results be published automatically?
If a Quiz can be auto-marked by MyLO, it is possible to publish the results in the Quizzes and/or Grades tools automatically. This works in cases where multiple choice, true/false and similar question types have been used. However, it is not suitable for Quizzes with questions that need to be marked manually, like short and long answer questions. You will need to ensure that particular settings are in place in order for this to work. See the Publishing results to Grades section below for more information. Click here for more information about questions types.
Publishing results in the Quizzes tool using Submission Views
By default, when a student completes a Quiz, they will see their score. As a Unit Coordinator/Lecturer, you can control what information is released, and when it is released, using the Submission Views option (you can see this when you edit the Quiz).
- If you want to show students their score and feedback immediately after they complete a Quiz, you will need to change the Default View settings to include particular information, like incorrect answers, correct answers and so forth.
- If you do not want students to see their score immediately after they finish a Quiz, you will need to turn off the Show attempt score and overall attempt score option in the Default View settings.
- If you do not want students to see a score and/or feedback until a particular date and time, you should set up an Additional View.
Tam demonstrates how to edit the Default View and Additional View settings in this video. Alternatively, download this step by step guide to creating a Quiz.
Publishing results to Grades
If you wish to publish Quiz results to the Grades tool, you will need to ensure that the Quiz is connected to a Grade Item. These instructions explain how. You will also need to decide whether or not you want the Grade Item to be hidden from students or not. You can also choose which groups of students should see the grades. This post explains how to change the settings of a Grade Item to make it visible/invisible to students, and to release it to particular groups.
To publish to Grades automatically, you will need to have these settings in place before students commence the Quiz.
These settings can all be found in the Quiz settings (click the dropdown arrow next to the Quiz name and select Edit).
In the Assessments tab:
- Ensure that the Quiz is linked to a Grade Item.
- Under the heading Auto Export to Grades, check the Allow automatic export to Grades option.
- Under the heading Automatic Grade, check the Allow attempt to be set as graded immediately upon completion option.
To publish to Grades after marking or checking Quiz results.
In this video, Peta shows you how to publish Quiz results manually, and how to avoid common mistakes when publishing results.
Help students locate Quiz results and feedback
Would you like your students to see the results of a Quiz that you have published? Make sure your students know where to look to get the information they need.
Use our template to quickly and easily create a News item, an HTML page, an email (sent from MyLO) or a Checklist item. The template contains instructions, with matching images, to help students find their results. You can see what it looks like by downloading this PDF. And yes – you can edit it to meet your needs.
To use the template, follow these steps:
1 – Use your mouse to highlight all the text in the box below.
<p>Hello everyone,</p> <p>I am writing to let you know that the results of the INSERT QUIZ OR TASK NAME HERE are now available.</p> <p><<REMOVE THIS SENTENCE AND THE NEXT SECTION IF YOU DO NOT WANT STUDENTS TO SEE THEIR ANSWERS, OR CORRECT ANSWERS>></p> <p>You can access your results and other information using the <em><strong>Quizzes</strong></em> tool. To do this, follow the instructions below. Alternatively, <a rel="noopener" href="https://mylo.utas.edu.au/d2l/lor/viewer/view.d2l?ou=6607&loIdentId=63929" target="_blank">this document</a> provides step-by-step instructions explaining how to access and interpret your results.</p> <p>To check your results, select <em>Assessments</em> then <em>Quizzes</em> from the MyLO toolbar. It appears just under the MyLO and UTAS logos</p> <p>Once the <em><strong>Quizzes</strong></em> tool has opened, locate the quiz and click on the dropdown arrow that appears next to it. Select the <em><strong>Submissions</strong></em><strong> </strong>option. <br /><br /><img src="http://blogs.utas.edu.au/teaching-at-tsbe/files/2015/01/Quiz-student-access-quiz-for-marks.gif" alt="Locating a quiz and selecting Submissions option" title="Locating a quiz and selecting Submissions option" height="116" width="537" /><br />You will see the number of attempts you have completed, along with your score for the quiz to the right. To see <<REMOVE ANY OPTIONS THAT DO NOT APPLY>> your answers and the correct answers, click on the attempt number (this will generally be<em> Attempt 1</em>).<br /><br /><img src="http://blogs.utas.edu.au/teaching-at-tsbe/files/2015/01/Quiz-student-access-quiz-for-marks-attempt-link.gif" alt="Image showing how to access answers, correct answers and so forth by clicking on the Attempt link" title="Image showing how to access answers, correct answers and so forth by clicking on the Attempt link" height="149" width="543" /></p> <p></p>
2 – Once all the text has been selected, right-click (CTRL + mouse click on a Mac) and select the Copy option or press CTRL and C on your keyboard (Command + C on a Mac). This will copy the code onto your computer’s temporary memory.
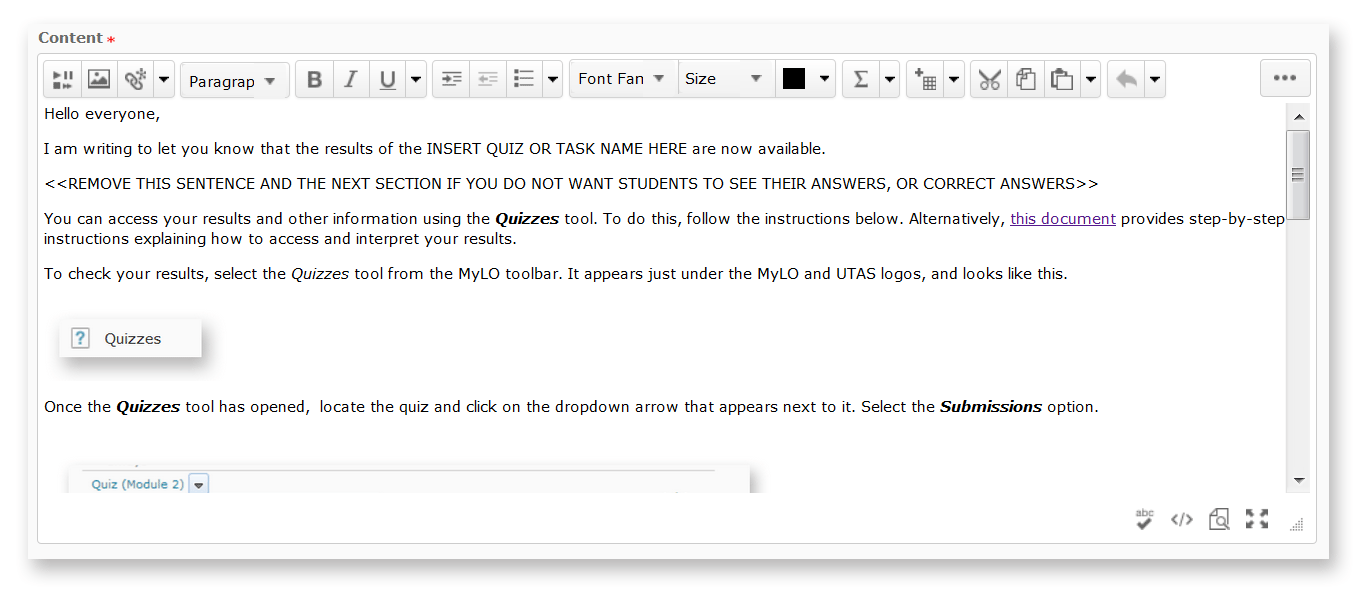
3 – Create a new Announcement, an HTML page, an email (sent from MyLO) or a Checklist item. The example seen below is a new Announcement. Give the new item a title/headline, then move on to the next field (where you put the bulk of your message/content). By default, the WYSIWYG (What You See Is What You Get) editor will open. Click on the HTML Code symbol, seen at the bottom right of the WYSIWYG editor. It looks like this </>
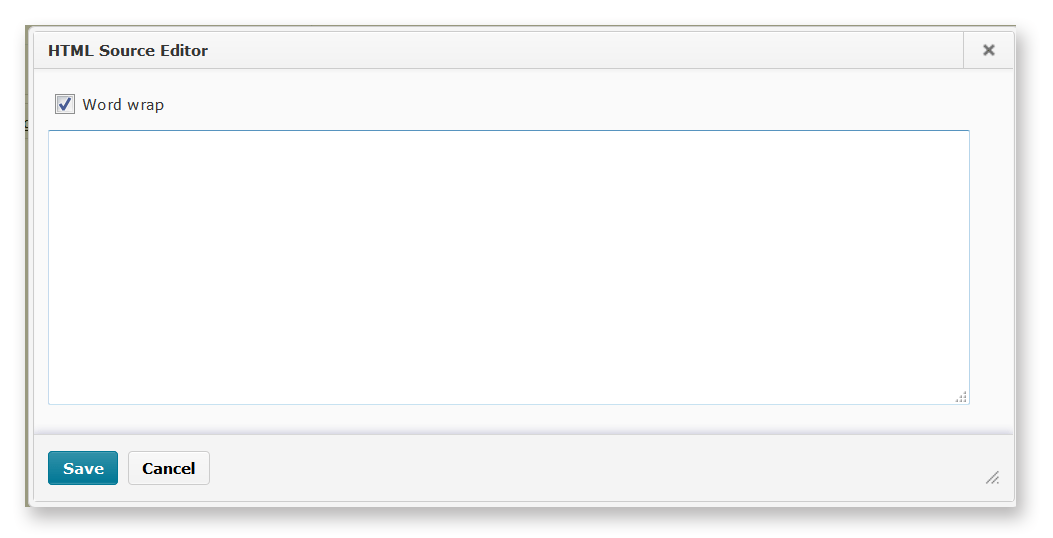
4 – A pop-up window will open.
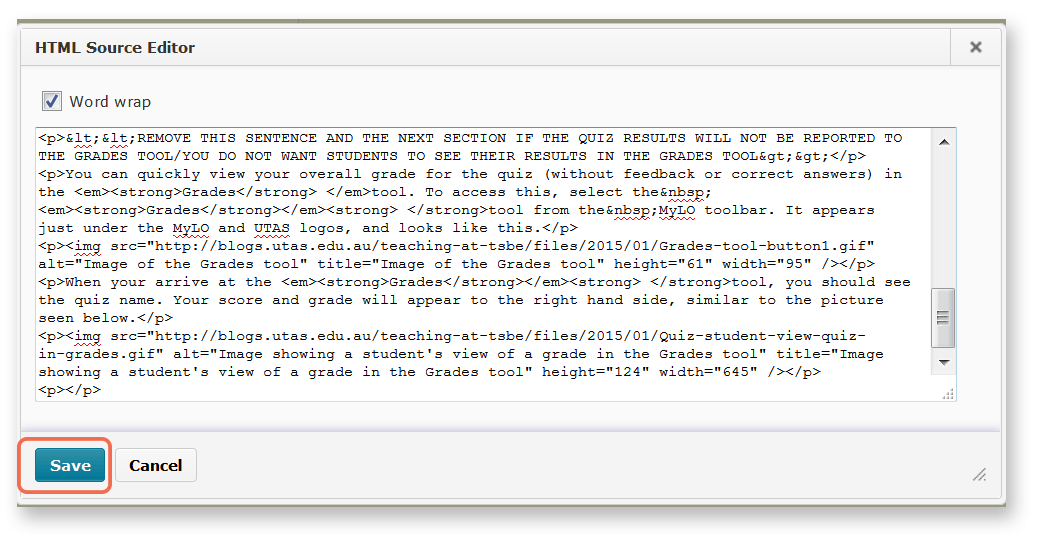
5 – Right-click (CTRL + click on a Mac) over the empty field and select Paste, or click your mouse on the empty field and press CTRL and V (Command + V on a Mac) your keyboard. The code will appear in the field. Click the Save button.
6 – The window will close. You will now notice that the template appears in the WYSIWYG view. You can edit it as you would a Word document, by adding or removing text. We have indicated sections that you may want to edit or remove using upper case text <<LIKE THIS>>. Remember to press Publish or Save (this will depend on which tool you are using) to save your changes.
Student Resource: How to locate Grades and feedback associated with an assignment submission
This Blog Entry explains how students can find their grade, feedback, Rubric feedback and Grademark feedback via the Assignment tool.
Please feel free to add the link to your MyLO site, or print it and hand it out to students, if you feel it would be helpful.
Link a Grade Item with a Dropbox, Discussion or Quiz
Grade Items act as the connection between an assessment item – like an assignment – and the Grades tool. If you want to mark and record grades online, you may need to associate a Grade Item with an assessment item.
You can link an existing grade item to an Assignment Submission folder, Quiz or Discussion Topic.
- Go to the assessment item you need to attach a grade to. Whether you’re creating a new one, or editing an existing one – find the section where you add a grade (either properties or assessment), then click the drop-down box under the heading ‘Grade Item’ and select an existing grade. If the grade item you had previously created does not appear it likely means this grade item is already being used elsewhere or has been set up as a ‘category’ (you can’t link a category, only individual grades).
You can create a new Grade Item whilst setting up or editing an Assignment Submission folder, Quiz or Discussion Topic. This grade item will then be connected to the assessment item.
- To do so as you create a new assessment item, or edit an existing item you will see (either on the ‘Properties’ tab or the ‘Assessment’ tab) an option for ‘Create a new grade item’.

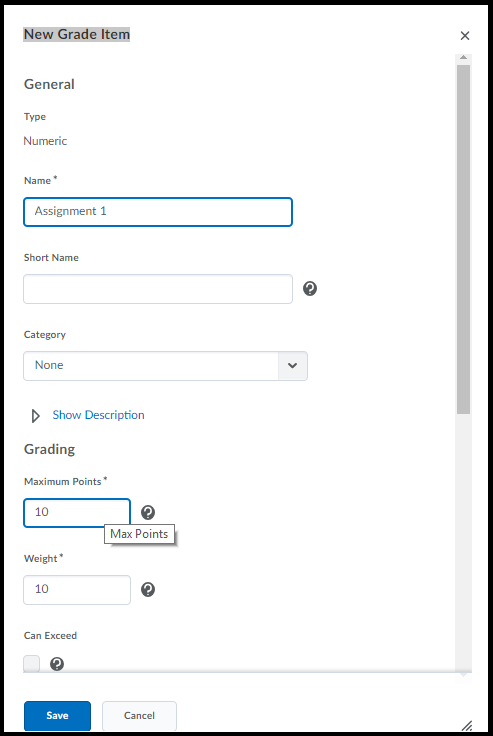
When you click ‘New Grade Item’ a window will pop up – in which you can enter the grade’s name, out of value and weight. If you’re not sure about any of the options here you can just leave them. You can edit this grade later in the Grades tool at any time. When you click ‘Save’ the grade will be created AND it will then be selected to be associated with the assessment you’re currently working in.
Track participation in tutorials and workshops
Do you monitor or assess student participation in tutorials, workshops or online classes? Tracking participation in tutorials can be quite difficult and time-consuming, especially when multiple staff are involved.
Using the MyLO Grades tool
Dr Gemma Lewis coordinates a large first-year undergraduate unit with over 450 students. Tutorials are included in the unit, and a range of tutors are responsible for collecting data on student participation. In the past, tutors completed a form for each tutorial and returned it to Gemma. Gemma would manually enter the data from the forms into an Excel spreadsheet. However, this was time consuming and forms were nor always delivered to her in a reasonable timeframe.
Gemma decided to use MyLO to remove the need for double-handling of participation data. She created 12 Grade Items in her unit’s MyLO Grades tool, one for each week. She developed a marking schema for tutors to use: 0 for no-show; 1 for attended with minimal participation; 2 for attended and contributed; 3 for attended and made contributions supported by theory. A similar set-up is explained here.
Tutors received training in how to filter the Grades tool for their convenience, as well as how to enter marks. Though some continued to make paper notes during class, all recorded marks into the relevant Grade Item rather than sending through a handwritten note or spreadsheet. All the Grade Items were organised under a Category, which automatically calculated a cumulative overall result for the each student.
Using participation cards
Dr Gail Ridley (Tasmanian School of Business and Economics) uses this process in her classes.
- Gail prints participation cards on coloured card as per the image below. The same cards are used every week.
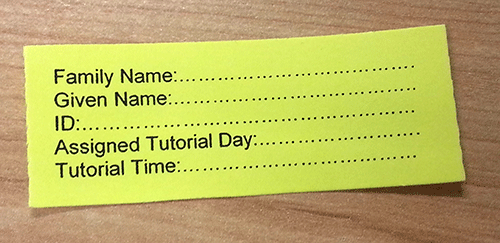
- Each card has room for a student’s name, student number and tutorial day and time.
- In the first tutorial for the semester, Gail hands one participation card to each student.
- The students are asked to complete the card with their details and to place their card on the edge of their desk.
- When a student shows a level of participation that satisfies Gail, she picks up the card from their desk (or asks them to hand it to her).
- Gail records a student’s participation mark in the MyLO Grades tool after the tutorial, then hands them back their card at the start of the next tutorial.
- Gail keeps the cards in an envelope between tutorials. In case some of the cards are not collected, Gail always keeps a few temporary cards on hand.
This method has an added benefit – the collection of the participation card is recognition of a student’s effort. In turn, quiet or shy students now have a role model that they can watch and listen to for ideas about how they might participate in future.
In addition, the participation card method allows the lecturer or tutor to focus on teaching, rather than distracting administrative tasks, during a tutorial.

