Manually add students to Groups
You may need to add students to a particular Group in your unit’s MyLO site. Here’s how.
Step 1:
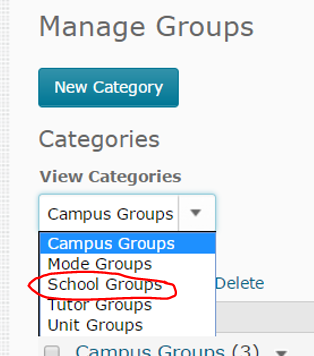
Select the Groups tool from the MyLO toolbar, then select a Group Category (the ‘container’ of the Group you wish to add students to) from the View Categories drop down menu.
Step 2:
Select the name of the Group that you would like to add students to.
Step 3:
Select the Enrol Users button.
Step 4:
You should see a table containing the names of the students. Generally, the users are arranged in alphabetical order by surname (in the image below, student names have been blurred to protect privacy). You may be shown only 20 students per page by default. It can be useful here to select 200 from the per page menu, so that you can see as many students on one page as possible.
Select one or more students by checking the checkbox seen to the right of their names. You will know that a student has been selected because a small symbol will appear next to their name. Alternative, to remove a student from the group, uncheck the box to the right of their name. Finally, select the Save button.
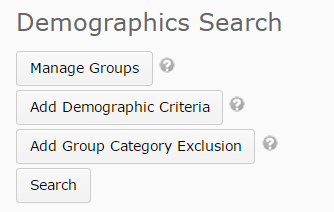
TIP: If you have hundreds of students enrolled in a unit, you may find the Advanced Search Options useful when enrolling students in a Group. A link to these options is located to the top left of the table of students.
If you wish to exclude students from the list based on Study Mode, Campus or Unit code choose the Add Demographic Criteria option. If you wish to exclude students who have already been enrolled in a Group in the same (or a different) Group Category, choose the Add Group Category Exclusion option.

Once you have selected your preferred options, select the Search button. You should now see that the list of students available to enrol in the Group has now been filtered.


Comments
This post doesn't have any comments