Copying & Splitting Echo360 Recorded Video
To split up a video on Echo360 you don’t need to have any extra software, you can do it via the Echo360 interface. If you do have your own software and know how to use it of course you can do it by downloading & editing but this guide covers using only Echo360.
First: Enable Copying
You will need to enable “Copying” in Echo360. You will only need to do this Once Per Unit.
Click into Echo360 for your unit (via MyLO if the link is there, or log into Echo360.org.au via institution). Make sure you can see your class list of videos.
Click ‘Settings’ at the top right.
Click ‘Features’ from the menu to the left.
Toggle ON the option for copying by instructors.
Click to see this part in action (no sound)
Next: Make Copies
Make a copy of your video for each part you need. So if you have a video that you want to split into 3 parts you’ll need to make 3 copies. That way the original full length video is still there too.
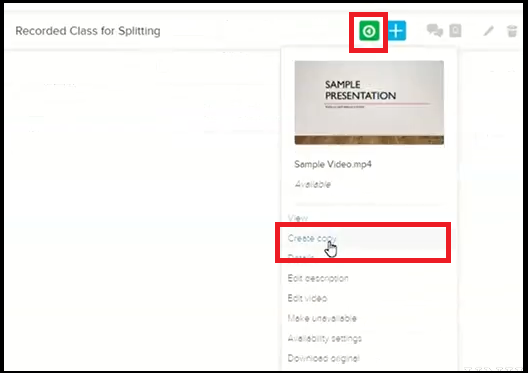
Click the green play button to the right of the recording & choose “Make Copy” then click “OK” on the confirmation window.
Each copy goes to Your Echo360 Library, so keep a mental count on how many times you click this option. You won’t see the copies in the class list yet.
Next: Find the copies in Your Library
Head to your Library by clicking Library top left of the window.
It helps to also name the copies to more useful names. To do so, click the video to go into the preview. Below the preview are options for ‘Edit’ which lets you name the video & Edit Media which lets you edit the video itself. Click ‘Edit’ to rename.
Make sure you name the copies in a way that tells the student what the video is, if you have a topic that might be useful to add as well.
Next: Edit each copied part
To edit the media click on the video to preview then click ‘Edit Media’. You get a confirmation window here, click OK on that – each copy is treated separately. Editing one won’t affect the others.
You can use the playhead to preview the video. If you’ve added some ‘break’ slides or an obvious point at which to cut you should be able to see what time in the timeline the segment you want to keep is at.
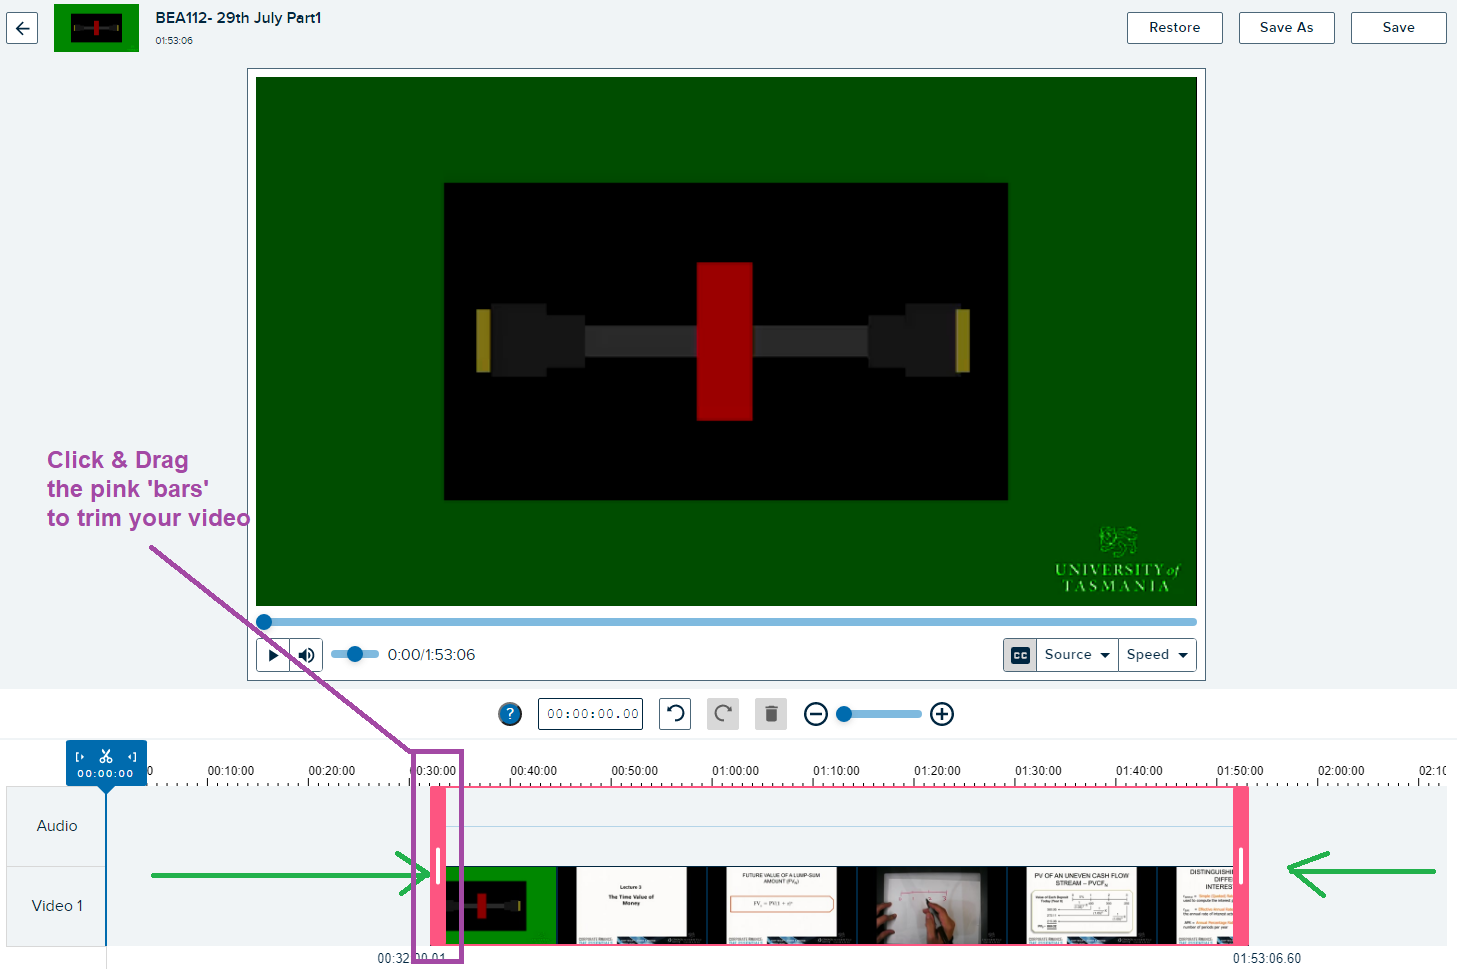
Most of the time you’ll only need to “Top & Tail” your videos.
To top/tail a video – drag the left side pink part in and the right side pink part in.
When you’re done click ‘Save’ above (top right). You’ll get a little popup confirmation – if this doesn’t appear right away wait a little bit before trying again, sometimes it’s slow.
Finally! Adding to the Class!
Once processed the videos can now be shared to the class. They will remain in your personal library as well. Just click the video and then from the options below the preview choose “Share”.
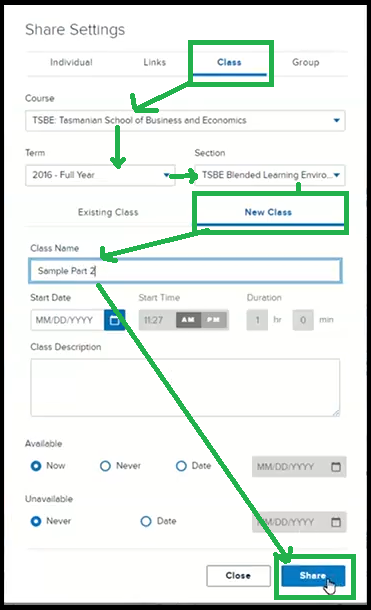
Click the “Class” option then find your unit from the list. (ignore the example text in my screenshot, find your own unit & semester)
Choose the Semester and cohort.
Click “New Class” (in this software class means video).
Give it a useful title & click ‘share’, it won’t re-process & will be immediately available in the unit’s echo360.
Comments
This post doesn't have any comments