Rubric Maker – Copying from Word
The Rubric maker tool is a website built by Kevin Lyall & Connor Deckers of ‘MyLO Mate’ fame that allows you to easily convert a rubric from a word document to MyLO without having to re-type everything or calculate the scores manually.
The link is: https://www.utas.edu.au/building-elearning/resources/mylo-rubric-generator
This basic help document won’t go into everything, but will cover the basics of taking a simple Rubric from Word through the Rubric Maker and into MyLO.
Step 1: Have your Rubric Ready in Word!
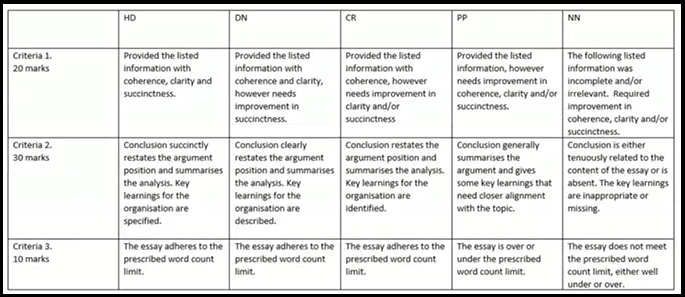
The rubric maker assumes you have a rubric set up in word using the standard UTAS grading system, HD (80-100), DN (70-79), CR (60-69), PP (50-59), NN (0-49).
Your rubric does NOT need to be marking out of 100 points.
You only need to know what the point value or weighting of Each Criteria are.
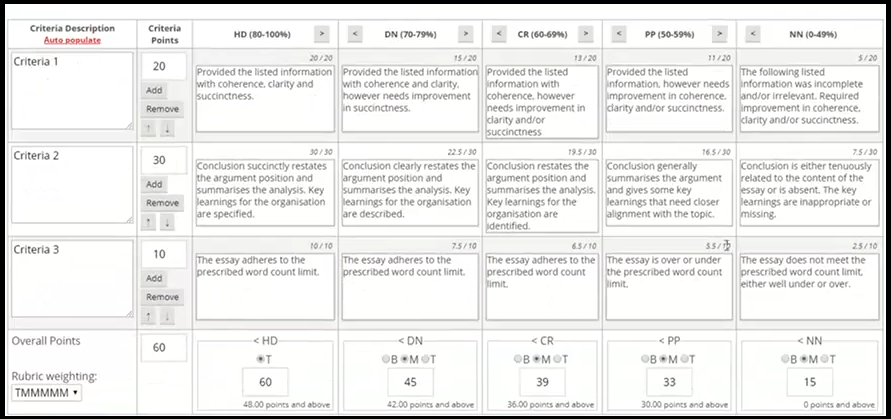
Take a look at the example rubric below. It marks out of 60. Each criteria has a points value. It will work just fine in the rubric maker tool. Note that to work correctly your table needs to have separate cells for each criteria & its levels. Merged cells will not work, they’re not supported in either the rubric maker or in MyLO, so you’ll need to split any merged cells back into the individual cells.
Step 2: Open the Rubric Maker Page
Let’s open the rubric maker page. Don’t be put off by the options you see, the defaults should work just fine. The only thing you might want to check is if you are using weights (ie, percentages) for your criteria values – check the option under ‘Calculate by’ to ‘Weight’ or if you’re using points values check ‘Points’.
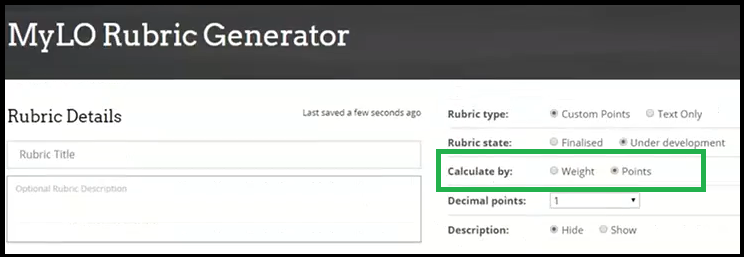
If you choose ‘Weight’ here you will get an additional option to choose how much your rubric should calculate to (if not 100). Useful if you’ve had a rubric set up with weighted criteria values but that then needs to calculate to something other than 100. Not sure? It’s okay, you can change this option at any time.
Step 3: Copy the Criteria/Description part of your table in Word to the clipboard.
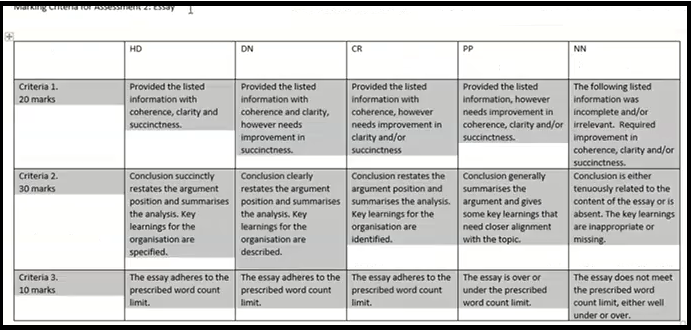
Back in Word, select the criteria & their descriptions. You don’t need to select any column headers. See below.
Copy this part to the clipboard (cntrl-c or option-c)
Step 4: Paste into the ‘Import Content’ – ‘Paste from Word’ part of the Rubric Maker
Back in the Rubric Maker page – find the ‘Paste from Word’ box and click in it, then cntrl-p (option-p) to paste the clipboard contents in.
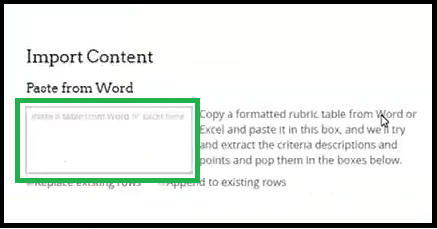
Once you do this you will immediately see the contents of your clipboard pasted underneath populating the cells/rows of the table. In the example below you can see it has auto-populated the descriptions and points values.
Points Defaults: At the bottom of each column you can see there is a choice of “B M T” these are the default values that will be added as cell values, they are Bottom (the lowest score in that range), Middle (a midpoint between the two) and Top (the topmost value of that range). Only the very left-most column is hard-wired to Top only as this is how MyLO calculates the rubric total. Here we’re just choosing some defaults, you can edit these however you like in MyLO once you’ve imported it.
Step 5: Check & Name your Rubric!
Important, now take a look at the content that was created. Check that ‘Criteria Points’ column is set correctly. You can edit any of the values in the Description, Points (or weights), & any of the ‘Levels’ by just clicking & typing. Make sure the ‘Overall Points’ value is calculating the way you want it. You can make adjustments to the Points/Weights if anything is out.
While you’re here – add a name to your rubric at the top of the page. Make it a useful name, usually the name of the assessment it’ll be attached to.
Step 6: Download the Zip File to your computer
When you’re happy with your setup scroll down to the area under the rubric table and click the ‘Download MyLO Component’ button.
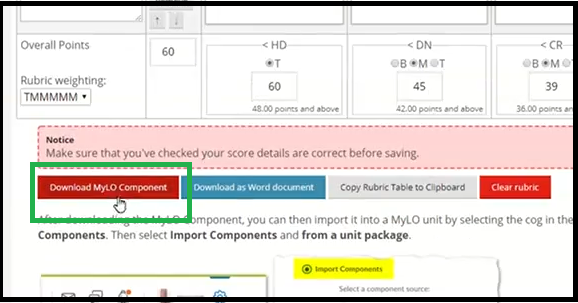
This will send a ZIP file to your default ‘Downloads’ directory. You will need to keep this ZIP file handy (don’t unzip it).
Step 7: Go to Import/Copy etc Tool in MyLO
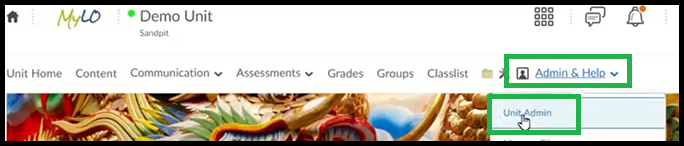
In your MyLO unit head to ‘Admin & Help’ then ‘Unit Admin’ then find ‘Import/Export/Copy’ and click this option.

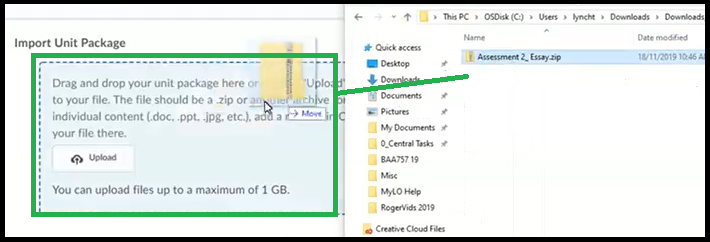
Click ‘Import’ and then drag & drop your ZIP file into the space provided.
Choose ‘Import all components’.
On successful import you can leave this window (either click ‘view content’ or ‘rubric’ or just close it out).
Step 8: Head on into the Rubric tool to finalise the Rubric.
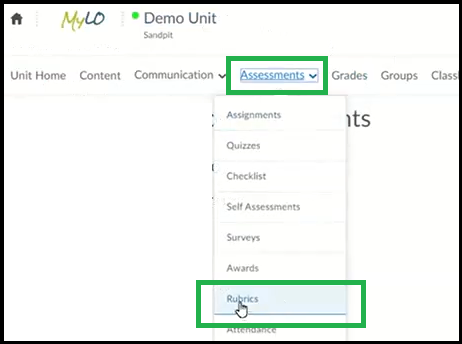
Go to Assessments – Rubrics from the menu in MyLO.
Click on your imported rubric to edit.
First check the values, criteria descriptions and overall values. Make any adjustments here. You can also ‘tweak’ the value in each cell but note the column with the highest value is used to determine the overall score of the rubric, so be careful making adjustments to scores in the ‘HD’ column.
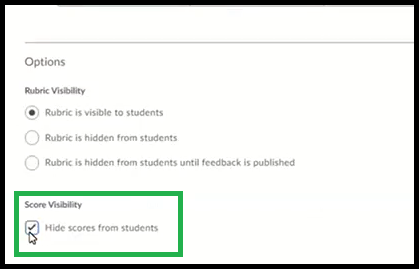
Scroll down to the ‘Options’ section under the rubric table & click on it to check any options you wish to use. I usually check the option ‘Hide Scores from Students’. It means students will see what the criteria & level chosen but will only see the overall score at the end (makes moderation easier).
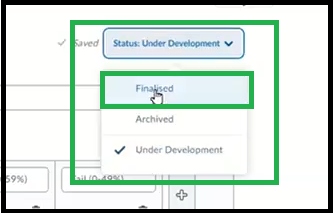
When you’re happy with your rubric scroll up to the top & choose ‘Finalised’ from the option at the top. It is now ready to attach to an assignment or grade item.
The rubric tool in MyLO auto-saves as you go, so once you’ve finalised it you can go ahead and use it somewhere. See below for further help.
Attaching a rubric to Assignment
Comments
This post doesn't have any comments