Attach a Rubric to a Grade Item so that you can mark with it
Once you have created an electronic Rubric in MyLO, you can attach it to a Grade Item. We recommend attaching Rubrics to standalone Grade Items that will be used to grade Discussions, or to keep track of work that is performed in class, like participation or presentations. This page will show you how.
We recommend attaching Rubrics directly to an Assignment Submission Folder, rather than to the associated Grade Item. If you need to attach a Rubric to an Assignment Submission Folder instead, you will find these instructions more helpful.
NOTE: One of the down-sides of attaching a Rubric to a Grade Item, is that the Rubric Score will not articulate to the Grade Item (as it does when used with a Assignment Submission Folder) automatically. When you finish marking a Rubric, make note of the Rubric total score, then record this into the Grade Item Score field.
Step 1
Before you finalise your Rubric and attach it, you must ensure that the Rubric is correctly set up. You may wish to return to the Rubrics tool and check the text and settings before finalising it.
WARNING
Once you have started marking with a Rubric, you must not edit it. If you do, you will lose any marks/feedback you have recorded in the Rubric to date. Please check your Rubric carefully before marking with it.
Step 2
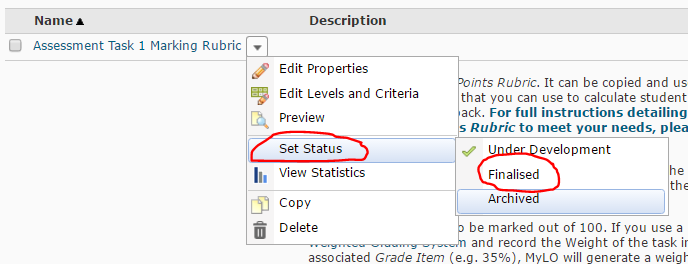
Select Rubrics from the MyLO toolbar, then locate your completed Rubric. Select the black arrowhead to the right of the rubric name. Select Set Status, then choose Finalised (a Rubric cannot be attached to another item unless finalised).
Step 3
Select the Grades tool from the MyLO toolbar. Locate the Grade Item that you would like to attach the Rubric to. Select the black arrowhead next to the Grade Item name, then choose Edit from the menu.

Step 4
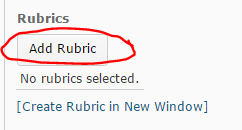
The Properties tab should open by default. Scroll down until you see the Rubrics heading. Select the Add Rubric button.
Step 5
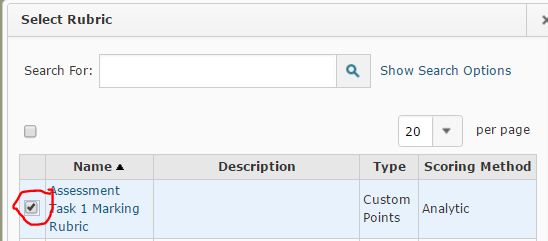
The Select Rubric window will open. Select a Rubric by checking the checkbox next to it, then select the Add Selected button (seen at the bottom of the window).

Step 6
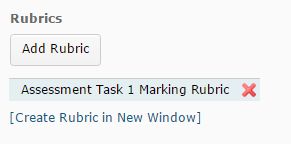
You should now see the Rubric name appear under the Add Rubric button. Scroll down and select the Save and Close button. If you have selected the wrong Rubric, select the red cross (the Rubric name will now appear crossed out), then select the Add Rubric button to select a different Rubric.
You can now start marking with your Rubric.
Comments
This post doesn't have any comments