Record Narrated Powerpoint
This document covers adding audio & narration to Powerpoint 2016.
Ensure your microphone is plugged in & working.
There are two ways to add audio to slides, you can record the entire slideshow at once while the slideshow is playing OR you can add an audio file to each slide one by one.
To add an audio file to a slide individually:
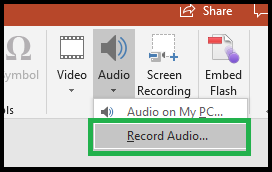
Go to the ‘Insert’ tab and then click ‘Audio’.
A small menu appears you can choose to add an existing audio file (if you have pre-recorded) or you can record directly to the slide.
To record audio directly choose ‘Record Audio’.
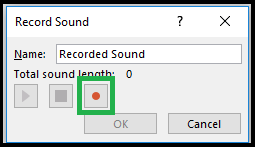
A small dialogue will open (as shown below). Click the small red icon (shown below highlighted with green) to start recording. Then click the blue square icon to stop. You can playback using the green triangle icon. If you click record again it will wipe what you’ve already recorded. Click ‘Ok’ when you are done recording to add the sound to the slide.
(Office 2016) To record the entire slideshow at once (including timings, animations etc):
In Powerpoint go to the Slideshow tab and locate the text that says “Record Slideshow”, click on the text and you get a choice to record the slideshow from the current slide or the beginning of the slideshow. Click whichever you require.
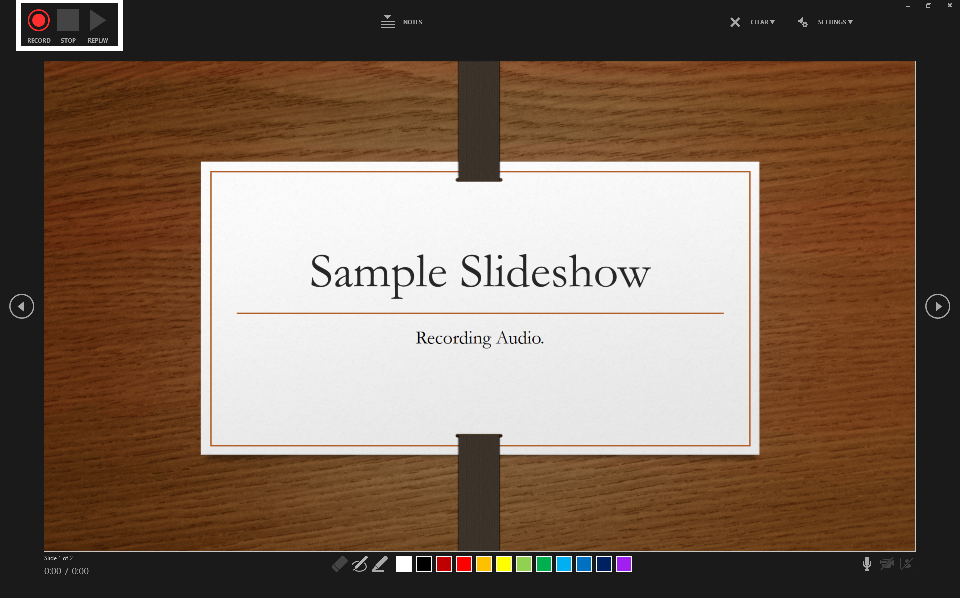
What loads is a new window that may have different options on it depending on your version of Powerpoint and/or settings you’ve altered. Somewhere you should see a red circle ‘record’ icon (shown below highlighted with white).
When you click record this time you will see a ‘countdown’ from 5, after which it will record your audio and (in some versions) any mouse-movement you do, as well as potentially other actions. To go to the next slide click the forward/back icons to the left and right of the screen (or use the directional arrows on the keyboard).
The slides will continue to play while it records your audio until you either press the Escape key on the keyboard or you reach the end of the slideshow at which point you will be prompted to stop. If the program asks to ‘save slide timings’ you can click ‘OK/Yes’, as slide timings are useful for playback.
For Both:
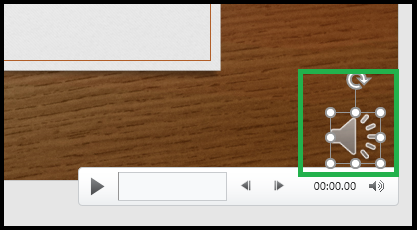
Regardless of which method you use the resultant audio files are shown with an icon – click on the icon to show the play controls. You can delete the audio from a slide by deleting this icon (click delete on keyboard while you have the icon selected)
Tips for Success!
Important – First Do A Test Slide! You should always test your volume levels first, does it sound okay? If you get crackles and pops you may be too close to the microphone. If the volume is too low scroll down to the Troubleshooting section and see if the instruction there is any help.
Remember to speak clearly and with a standard speaking volume for best results.
Before you go to the next slide – wait 1 second to ensure the computer doesn’t cut the end off your sound (older computers & older versions of powerpoint particularly).
Don’t continue to speak as you change slides – it might not record during any slide transitions.
Remember to save!
Before you re-record a slide remember to remove any existing audio from that slide first.
Troubleshooting
Volume bad? – Increase Mic Volume (windows 10) (mac)
Two audio’s playing at once? – Move the audio icon & make sure only 1 exists, if you’ve re-recorded a slide you might still have the old icon with its audio attached to the slide still there, if so you can delete it.
Audio not playing automatically? – Click the audio icon and look for tab called ‘Playback’ – click this tab and & look for an option next to ‘Start’ then ensure it’s set to ‘automatically’. This option might be listed in the ‘Animations’ tab on older powerpoint versions.
Slide advances too soon? – Check the ‘Transitions’ or ‘Animations’ tab and find the option for ‘Advance Slide’ – there may be a time listed, so ensure that time matches to the audio length. For more help on these topics go to the Powerpoint Help.
Recording Narration to Powerpoint, Adding Audio to Powerpoint.


Comments
This post doesn't have any comments