Edit a Checklist from Content
If your Ed-Tech has created a set of checklists for you and added them to your content area you may then need to go into each one and flesh out the details. You may also want to make a quick change to a checklist that you have previously edited or created.
Or you might have copied a unit from another semester and need to update your existing checklists.
The good news is, you can do it all from where they sit in the Content area with very little fuss!
First click the ‘Content’ button on the toolbar to load up the Content area.
Click the module/folder that contains your checklist, usually these will be in Learning Hub possibly in their own subfolder.
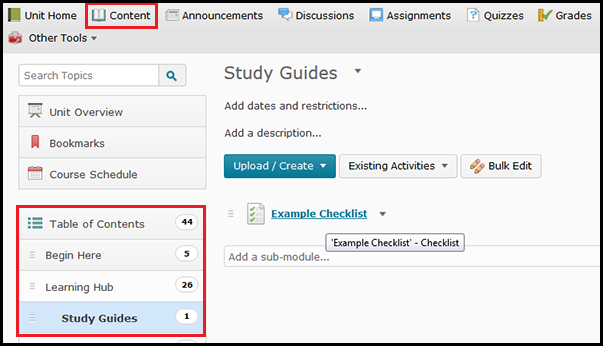
In this example I have clicked Content then Learning Hub and Study Guides to find the example checklist I will edit.
When you see a link to your checklist on the left part of the screen just click on it and it will load up in to the screen, similar to the example checklist in the screenshot below.
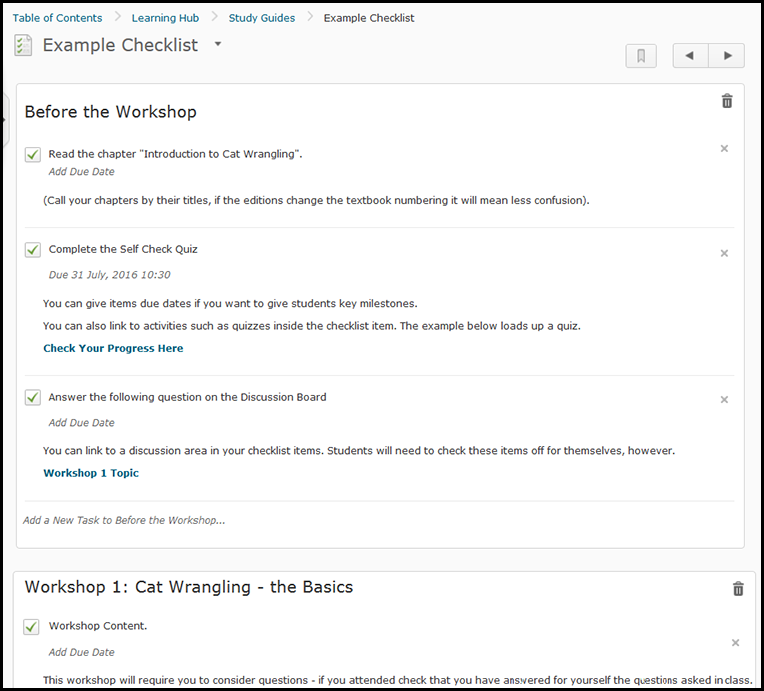
A checklist in the content area shows all of the text/content within.
Editing Checklist Items
Once you’ve clicked on your checklist you’ll see each item listed out – (ignore the little checkbox icon). The example below shows the category headings and checklist items for the checklist “Example Checklist”. When you move your mouse over any item it will highlight in grey, this grey indicates it is an item that you can click on to change.
To edit any item- click on the text that you need to edit.
Category or Task Names:
If you click on a title to change the text (as shown in the example below), you will see a text field to type into. Make any changes you need then click elsewhere on the page. This works for both Category names and Task names.
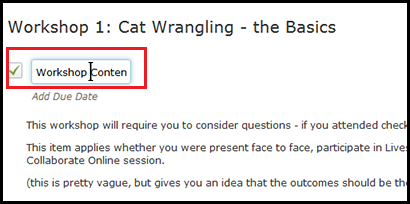
To edit any title, just click on it, type, then click somewhere else.
Descriptions:
If you click on one of the ‘description’ areas it will load a bigger more feature laden text field that allows you to do more advanced text editing, this tool is found throughout MyLO. There are further instructions for using this text editing tool listed below the screenshot. Click the “Update” button when you are done adding text to any area that loads up one of the Text Editor boxes.
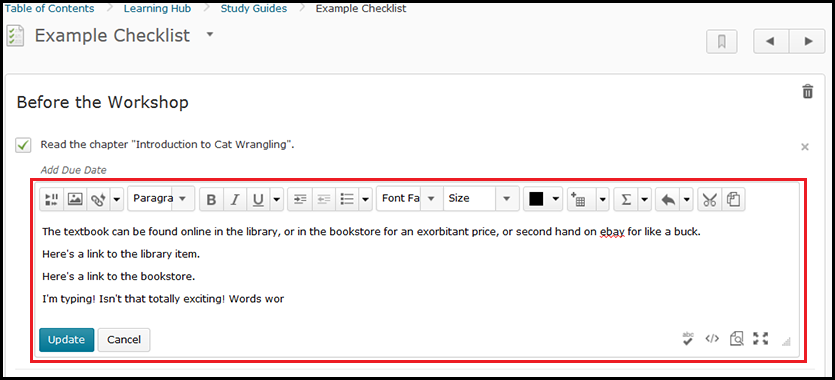
Most ‘description’ fields load up with the text editor tool. Don’t forget to click “Update” when you are done!
How to use the Text Editor (Page) Tool – list of resources (PDF | Video)
Deleting Items from the Checklist
To the right of any category is a bin icon – if you click the Bin icon you will delete the category and all of the items within this category.

Each category has a “Bin” icon to the right. Click to delete the entire category.
To the right of any checklist item is a small (x) – if you click the small (x) it will delete that checklist item.
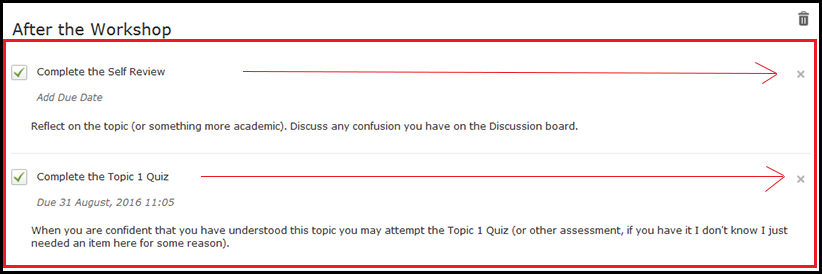
Each Checklist item also has a small (X) to the right, if you click this it will delete the item.
Adding Checklist Tasks and Categories to your checklist.
To the bottom of each category is a little area that has “Add a New Task to (category name)” – this will add a new checklist item to that category. It allows you to add checklist items on the fly to any category you have in your checklist. When you add it, click on the text to edit the title and description.
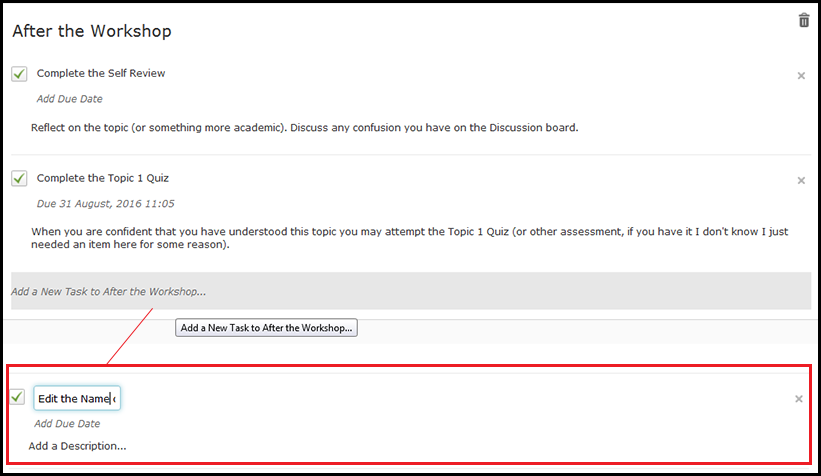
Click on the ‘Add a new task’ text as shown in grey above to add a new checklist item. Then you can click on the checklist item to edit it.
To the very bottom of the checklist is an item oddly named “Add a New List” – it should say ‘Add a new category’ because that’s what it does but, well, boosucks to logic. Click the “Add a new list” and you’ll get a new category just called “List (number)” but you can click on the title to edit the Category name, and add items as per ‘add new task’.
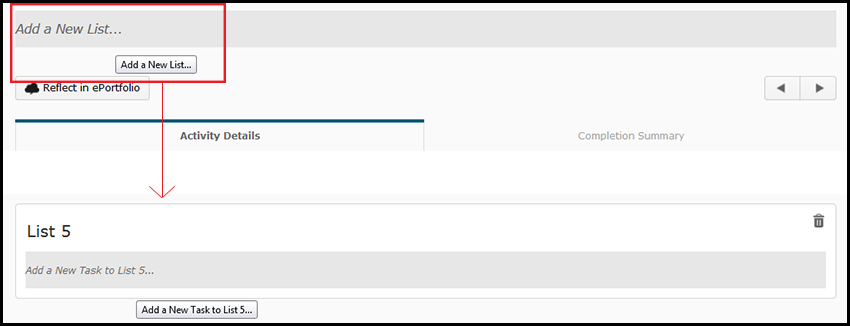
Click the Add a New List right at the very bottom of the checklist (just above the ‘activity details’ tab). Then you can edit the new Category that has appeared.
NOTE: If you do decide to add a new category here it will be added at the bottom of the checklist – however you can re-order items in your checklist from the Checklists tool itself. For further instruction on re-ordering items see the help sheet for Checklists: Reordering and Restrictions.
Comments
This post doesn't have any comments