How to Create a Checklist
This document covers creation of a basic checklist.
First go to ‘Other Tools’ and then click “Checklist” from the menu.
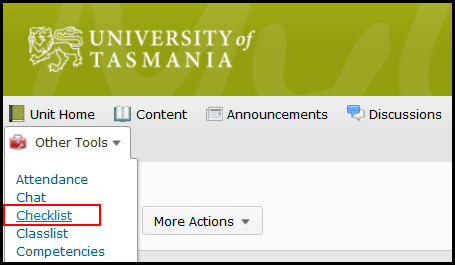
Other Tools – Checklist
There may well be a checklist or two loaded into your unit. TSBE units will have the Step 3 agreement in the checklist items.
To create a new checklist click the “New Checklist” button at the top of the checklists page as shown below.
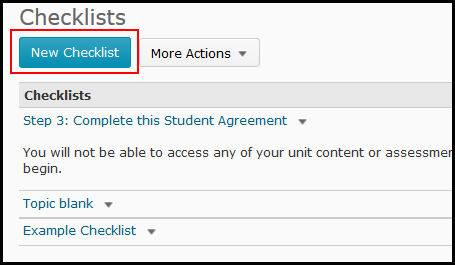
Click New Checklist
When you create a new checklist a window will load that asks you to type in a name and description.
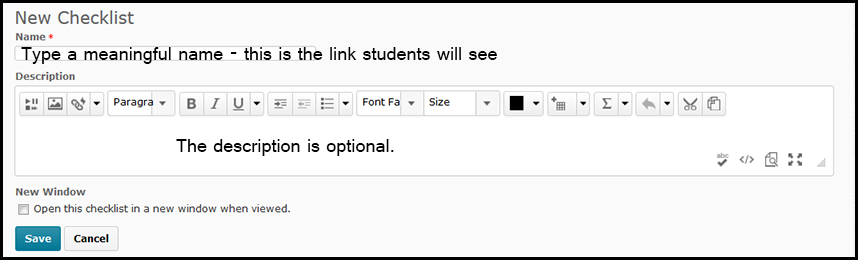
The “Name” field is the link that students will see when you add the checklist to content.
When you type your name, as noted above, be sure to make it one that will make sense in the context of the content it is being created for. For example – if this is a checklist for your Week 1 Study Guide, then this is the name you would give it. Whatever you type into the Name field becomes the link that students see and click on to access the checklist.
Click ‘Save’.

New items appear when the checklist is saved.
When you first save your checklist new options appear as outlined above in red. This is also the screen you will see if you click on an existing checklist inside of the checklist tool. The example above hasn’t got any items or categories yet so let’s talk about what these are and how to add them.
Categories.
A category is simply a way to ‘group’ a list of items together visually. It adds a sub-heading to your checklist and is useful for breaking up content into logical chunks inside of a checklist. A category does not have an associated ‘checkbox’ and is only there for visual clarification. Your checklist does need to have at least 1 category, so to start with add a new category to your checklist.
To add a category just click the “New Category” button and fill in the name and description.

Give your category a descriptive name.
Remember to give your category a descriptive name, this text will be shown as a sub-heading inside of your checklist. When you click Save you will be taken back to the main Checklist page and you’ll see your category listed just under the buttons.

Categories and items are listed just under the buttons.
To add individual item to your checklist click the “New Item” button. It will load up a window similar to the one we just saw for a category with some extra options.
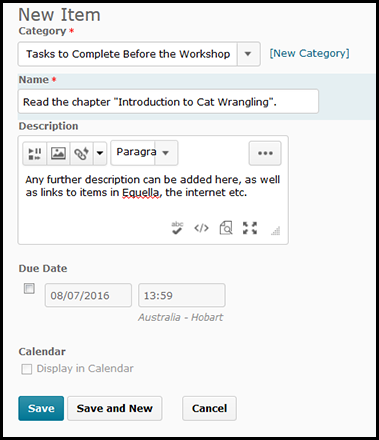
New Checklist Item page, again type a descriptive name and add some useful instruction in the ‘description’ field.
The first extra option to be aware of is the “Category” option. Make sure this item is in the correct category – choose from the dropbox at the top.
Give your item a descriptive name, this text will sit to the right of the checklist button that students click so make it an “actiony” name – ie something that they need to do that they can then check as “done”.
The Description field is optional but important too – here you can add instructions and even links, images, media and so forth. This is the standard “text editor” that appears elsewhere in MyLO too and there is a list of instructional videos that cover how to use this tool for structuring your text.
Optionally you can add a “due date” to your checklist item – it doesn’t “block” a student from doing it late but it will flag the ones that do. It may be a handy way to add important milestones into the calendar as you can add this item to the calendar if you give it a due date.
Click save when you are done, or save and new to add another Checklist Item.
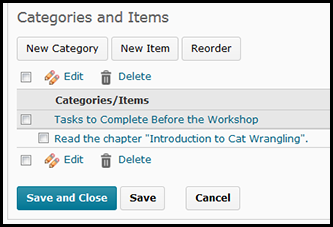
The item appears indented under the category it belongs to.
As you can see when the item is saved, it appears indented under the category it was linked to. Wrong category? Just click any item to re-open the ‘edit item’ screen to choose the correct category. You can also re-order categories with the “Reorder” button.
Below is a screenshot of a checklist that has a few categories and items in it:

A completed checklist showing multiple categories/items.
Here’s a checklist that has many items in it, it’s not a perfect example it’s just for showing how it looks. The items that have a strange grey icon to the right are those that have a nominated ‘due date’ and the date is shown to the right. Any item can be edited by clicking on it.
To add this to your Learning Hub or other Content area you need to first save and close this checklist then navigate to your content area and choose “Existing Activity” then “Checklist”.

Adding a checklist to Content is easy!
When you choose “Checklist” a list of the available checklists will appear, just click on one and it will be loaded to your content page.
From here you can further edit/refine your checklist – however there is an alternate set of instruction for this in another entry.
Comments
This post doesn't have any comments