Add an image element to an HTML page in MyLO
The Interactive Content Builder (ICB) (opens in new window) template includes three Images options:
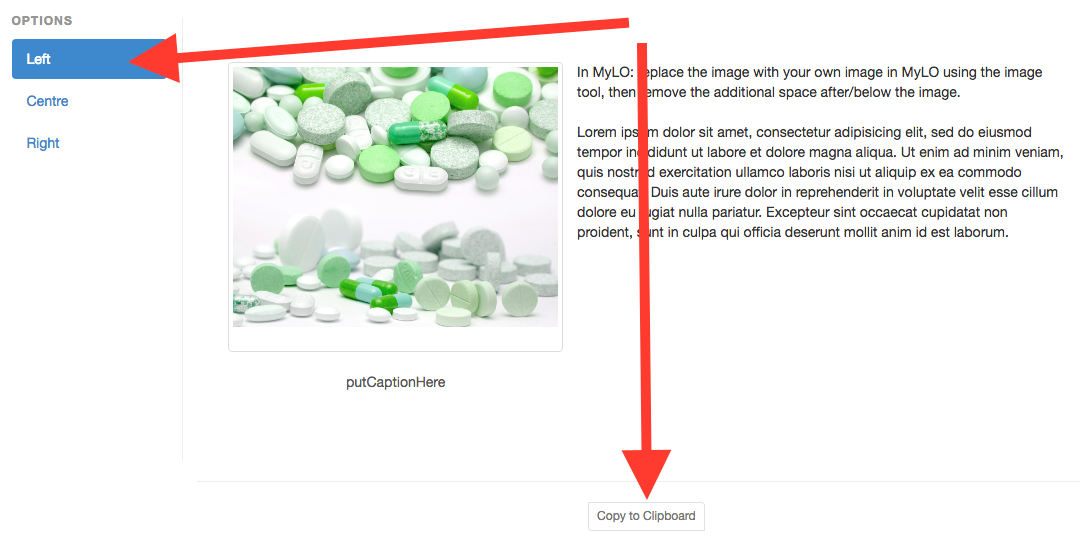
- Right, where an image is presented to the right of the screen with text wrapped around it.
- Left, where an image is presented to the left of the screen with text wrapped around it.
- Centre, where the image is centred. Text appears above and below the image: it will not wrap around the image.
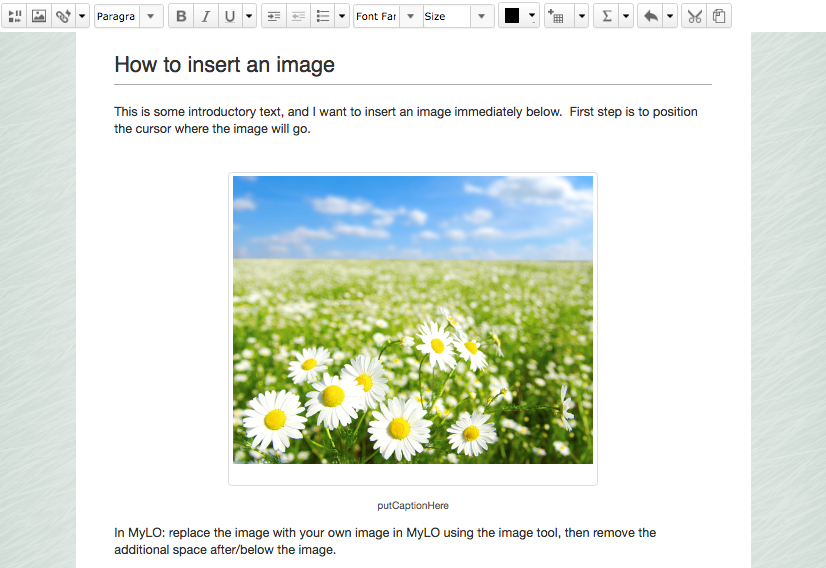
All the image options contain a border around the image, and an area beneath it for a caption.
In this post, you will learn how to add an image element to an HTML page (based on the ICB template) in your MyLO site. Alternatively, you can see the process demonstrated in this video (opens in new window).
Step 1
Open your MyLO unit in a browser tab or window, then locate the HTML page that you wish to add the image element to. Keep the browser tab/window open. Open a new browser tab/window and navigate to the ICB Template Builder. You should now have two browser tabs or windows open: one with your MyLO HTML page; the other with the Template Builder page. You will be moving between these tabs/pages throughout this activity.
Step 2
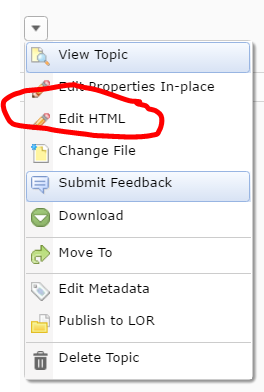
Jump to the tab/window containing your HTML page. Select the black arrowhead to the right of the page name, then select Edit HTML. You can now edit the page.
Step 3
Now jump to the Template Builder page that you opened earlier. Select Images, then choose one of the options from the menu on the left (e.g. Left, Centre or Right). You may wish to move between the options until you have found your preferred element. Once you have located your preferred element, select the Copy to Clipboard button beneath it. This will copy the element to your computer’s temporary memory.
Step 4
Jump back to your MyLO HTML page, which should still be in editing mode. Place your cursor where you would like the image element to go to go, then select the following keys on your keyboard: CTRL and V (PC); or Command and V (Mac). This will paste the image element into your page.
Step 5
If you’re happy with the position of the image element, you may wish to press the Save button at the bottom of the page to save your changes. If you are not happy with the position or type of image element, select the following keys on your keyboard: CTRL and Z (PC); or Command and Z (Mac). This will undo the changes you just made.
Next Steps
Once you have inserted your image element, you can replace the image, caption text and (where relevant) the wrapped text.
Comments
This post doesn't have any comments