How to Set Release Conditions (restrictions / selective release)
Need to make an announcement that is only visible to external students? Want a grade that only ‘tutorial group 6’ can see? Need to release some content to only those who have completed a certain quiz? In many parts of MyLO you can set up release conditions that control who can see a chosen tool/content/announcement.
Release conditions can be set up in tools like (click to see screenshot of where the option is in these tools):
- Announcements
- Assignments and Quizzes
- Content areas (modules or individual files)
- Grades and Categories
- Discussion topics and forums (there are easier ways to set up group discussion in bulk).
Release condition options include things like:
- Membership of a certain group(s)
- Grade range or attempt of a quiz/assignment
- Role in the unit (ie, staff or tutor)
- Checklist completion
Release conditions can be set from within many tools. They are usually situated in the ‘Restrictions’ tab of the settings in the different tools, or in the ‘Edit Properties in place’ option of your content areas, or in the announcement tool as you’re creating the announcement.
Look for the subtitle “Release Conditions” under which you will see two buttons: “Attach existing” and “Create and attach”. The buttons might also be called simply ‘Create’ and ‘Browse’ depending on what tool you’re in. Yes I know.
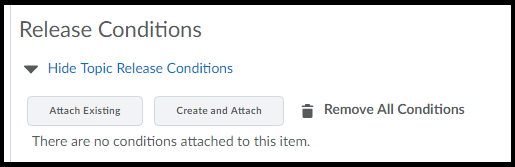
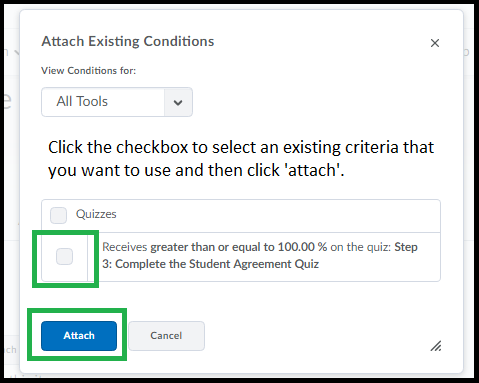
The ‘attach existing’ ( or ‘browse’) button lists all/any criteria that have been created in this unit for other tools in case you want to replicate them easily. To choose an pre-existing criteria just click the check-marks next to the ones you want to use and click ‘attach’.
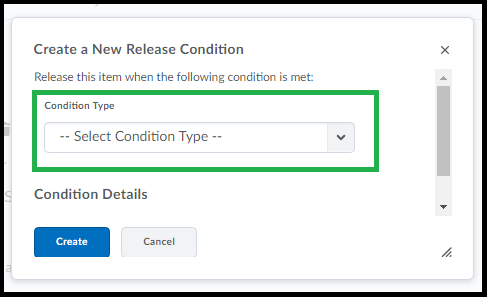
To make a new release condition: Click the ‘Create’ or the ‘Create and Attach’ button.
A window will load with a drop-down menu – choose from this menu the type of criteria you need to set. For example if you want only a specific group of students to see an item you will need to choose “Group Membership” (sometimes located under the subheading of ‘classlist’ sometimes not).
Some of the options, when selected, will then load another drop-down menu, allowing you to further refine the criteria. Some also allow you to type specific information (for example a grade that has to be achieved). The example below shows how more options may load so you can specify further information.
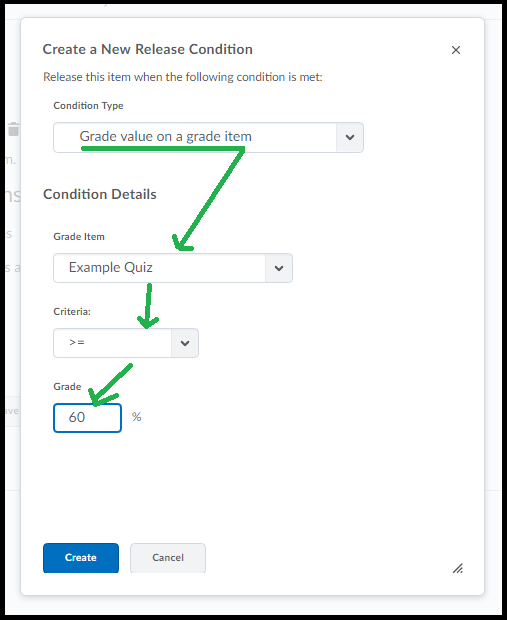
When you have set up the criteria the way you want click ‘Create’.
The criteria will be listed under the buttons now. You can add more criteria with the ‘Create and Attach’ or ‘Browse’ buttons.
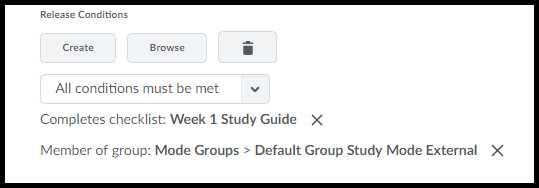
Notice that there is a drop-down menu just above you can specify ‘both’ or ‘either’ under the criteria so ensure it’s set the way you need it to be set using basic logic of “do they need all or one of these to be true”. Think about it. No really. Think about it. You’ll get it.

To remove a restriction … click the X to the right.
Don’t forget to hit the “Save” or “Update” button for the tool you’re on, when you’re done.
Notes:
If you create release conditions for grade items, groups etc – don’t forget that your ‘view student’ will also be subject to those release conditions. For example if you want to preview with the view student something you’ve restricted to a group you’ll need to add the ‘view student’ to that group.
Top level item conditions will also apply to any element within them. For example a release condition you set on a Discussion Forum will ‘apply’ to any topics within it. A release condition you set on a Content Module will ‘apply’ to the submodules within it. If students can’t see something that they should see check there aren’t competing release conditions on higher level components.
Release conditions don’t over-ride options that hide the item, for example setting content draft mode will hide from students even if a release condition is set. Likewise grade items that are hidden are hidden no matter what criteria is set on them.
Release conditions on the Assignment/Quiz tool will also over-ride the “Special Access” option if they conflict. For example if you set up an assignment with a selection criteria of “external students only” but then set up a special access’ for an internal student – that internal student won’t be able to access the assignment, even with the special access set. The best way to mitigate situations where you want to restrict access to a specific group but allow occasional access to specific individuals is to create another separate group for those exception cases – add those specific students to it – then add that ‘exceptions’ group to the list of groups who can access the tool/item in question. Then ensure the drop-down menu above the criteria list is set to “Any condition must be met”.
If confused/stuck/lost please contact your ‘ed-tech’ or flex team for advice.
Comments
This post doesn't have any comments